Hello, everyone out there in this awesome crafty world! I hope your new year is going well and that you are all safe, healthy, and happy. Now…okay, I know I’m two months late, but it’s been that kind of year already! But I am going to work on these goals starting this month, March. My goals are to:
get my workroom cleaned up and organized (start 3/1 – end?) (Isn’t this typically an ongoing goal?!)
get my daily/weekly planner set up and working (start 3/1 – ends 12/31)
make at least 2 cards a week and post each one (start 3/1 – end?)
post at least 4 times a week on my blog (start 3/1 – end?)
start preparing my website for upcoming projects (i.e., sales, etc.) (start 5/1 – end?)
get my Tax ID for sales and affiliate links (start 5/1 – end?)
get my video camera up and running again (start 7/1 – end?)
make at least 2 videos a week to begin (start 7/1 – end?)
I know that is a basic list, but it’s what I’ve started with. I am working to sketch out the actual steps as I get things working more fluidly. While weather affects my scheduling and actual work, I am trying to plan it so that I have wiggle room. Unfortunately, Mother Nature has been a tad bi-polar for us here in Maryland – so I never know what each day may bring. My job is scheduled around weather this time of year – I drive a school bus – and if it snows good, I have extra time to work on my goals. If it snows slightly, that day is ruined…we go in 2 hours late and nothing gets done. Typically, I get 3 hours a day to come home from work, work in my craft room, then head back to work, except on Wednesdays. My evenings are usually filled with dinner, helping Gavin with homework, and getting ready for work the next day…4:15 am comes very quickly. So I really need to plan my craft schedule accordingly. I take my tablet and a bluetooth keyboard to work, so if I can’t get home, I can at least work on something in the car. I am trying to set up a “travel” bag so that I can work on my blog posts from my “car office” when I can’t get home. I really need to make the most of the little time I have to dedicate to my crafting world, so I really need to plan things with fall-backs, and other options if what I planned won’t work. It makes it hard and challenging, but I’m getting in the swing of things.
I also want to post a quote, or two, or three, a day. I want an “Inspirational” quote, a “Power of Positive Thinking” quote, and/or a bible quote – each day, to start my day and start my blog. I need to figure out how to configure my blog and website to accommodate these separately. I haven’t decided if I want a completely different format for them or just include them in the daily blogs….anyone have any opinions? I am including a “lesson learned” section in my planner so that I remember what I’ve learned that day and keep a record of that, as well a gratitude section that I will add what I am thankful for that day. I need to remember these things to keep me going and to keep myself focused.
So for today… March 3, 2019
Bible Quote – “Don’t be afraid. Just believe.” (Mark 5:36)
Lessons in Life Quote – When life gives you a hundred reasons to break down and cry, show life that you have a thousand reasons to smile and laugh. Stay strong. (I need to remember this every day!) – Lessons in Life Quotes App
Inspirational Quote – Sometimes the smallest step in the right direction ends up being the biggest step of your life. Tiptoe if you must, but take the step. – Inspiration Quotes App
and last but not least (for those out there who are “letting it go”
Letting it Go Quote – Sometimes we have to let go of what’s killing us, even if it’s killing us to let go. – Letting It Go Quotes App
My gratitude quote for today for my planner is pretty appropriate ‘ Everyday I like to wake up and remind myself to be grateful of the simple things.” – Miranda Kerr. Many of us tend to think about important things and the big picture, but we have to remember the little things that make up our day and be thankful for these things. You wake up every morning, do you thank God for that? You have a home and breakfast – it’s a simple thing, but we need to remember we are blessed to have that. You have a job, maybe a car to take you to that job, or you might work out of your home, or be a stay-at-home parent. These are all little things in the scheme of things – things we tend to take for granted because they are there every day for us. But we need to remember that in this world, those little things can be lost in a second – the death of a mate, the loss of a job, the breakdown of our car, environmental things that destroy our homes – many of us are very blessed, but some of us aren’t. We need to remember this and be grateful for what we have – every little thing – and remember to thank God for these things and to pray for others who don’t have these things or have lost them.
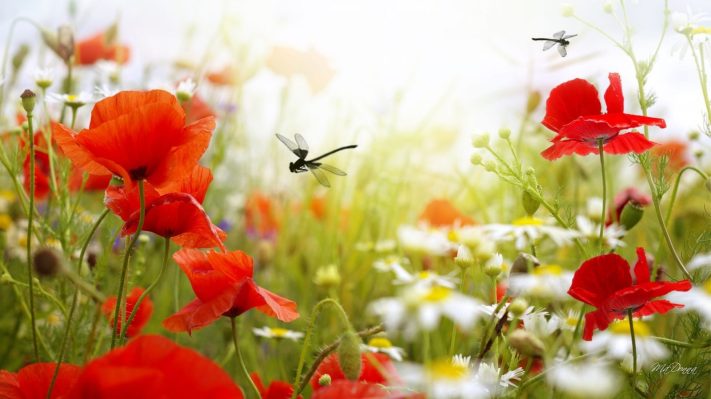
Well, I think I’ve rattled on enough. My son-in-law, Stefan Saxin, is a photographer (https://www.facebook.com/saxinphotography – yes, he does sell them, so check out his page!), so I am going to leave you with one of his photos to remember to be grateful. Have a wonderful day, everyone and be safe!
Hello, crafty friends! I finally got the chance to make some cards – snow day – and I wanted to get these online as soon as I could. This collection is from Scrapping for Less1 – January card kit. I love coffee…but not this much! LOL I had fun with this collection though.
I started with the cardstock that comes included in the kit. All of their cardstock is from My Favorite Things2 and they add 2 sheets of Neenah 110# Classic Crest Smooth Solar White3. I cut them all to 4.25 x 5.50, even the white. I like to use the Card Sketch sheet4to plan out my cards. Usually, I make one of each style for each collection, so that gives me a total of 16. Somehow, I lost one in the process…still looking for that 16th one!
Anyway, I take each collection and start planning out what I am going to make. This time, for some reason, everything got mixed up in the planning stage so I don’t know what collection is what and what special ingredients went to each collection, so it’s kind of a hodge-podge but it worked out okay. I cut all the pieces for each card out first, then the sentiment panel in the white, and matched the colors of the paper to the cardstock.
After this process, I decide what picture and/or sentiment I will use for each card. Since I had pre-cut all of these out of the white cardstock, I just stamped them using my Mini Misti5 and the Chestnut Roan chalk ink that came in the kit.
This is what my workspace tends to look like while this work is in progress (actually this is unusually cleaner than normal since I created a workspace behind me at my crafting table)… I am a messy planner…well, messy everything when I’m creating! Anywho, this is where I lost track of what papers went with what collection…oh, well. I also somehow ended up with three cards per pattern, and three haphazard cards that kind of got lost in the process!
You get to see my beautiful flannel sheets! LOL but it’s a large area and I just spread all the cards and paper out to figure out what stamp went with what collection. I had my Prismacolor6pencils off camera, and I started coloring in the pictures according to the pattern papers. Since I have a chart for all my pencils, I just used that to decide the closest color to match. Then I sat in bed and started coloring.
Gavin, my nephew who lives with me, likes to come in my room in the evenings when I’m sitting in bed…he says it’s to spend time with me, but I know it’s really my cat, Parker, he comes to see. Both my dog, Checkers, and Parker love Gavin, so they enjoy his company as well. He has a good eye for colors and helped me match up the pencil colors to the patterned papers.
Each card had either a colored main focus, or a cut-apart, so some had sentiment strips, and some used the sentiments in the cut-aparts. All the work is done on the design panel – the colored cardstock – and built from there.
Each design panel is cut down to 4 x 5.25, so there is a little white border around the edges. All my bases are standard A4, – 4.25 x 5.40. I usually use my preferred bases made from Ultra Heavyweight Cardstock, Double-thick 110 lb Cover, Digital Smooth, 8.5″x11″ White 98- Bright7. I get this from Amazon and it’s perfect for card bases – very sturdy. All my cards are usually double layered – one piece is given dimension with either craft foam or foam tape.
The first card was very simple. I used Sketch #2 and the insert paper was given dimension with foam tape. The oval ephemera from one collection fit in the oval cardstock, so I used that. It was built on the Sno-Cone cardstock. I love these colors and patterns! I added another piece of ephemera to give it a little more design, and sequins from the collection – actually, I dumped all four packages of sequins in a dish and just used what I wanted for each card. I figured since I messed up the paper stock collections, going this route wasn’t going to hurt! This next card is very bright and colorful. Using the Lemon Drop cardstock – and again pattern design #2, I matched the bright coffee cups paper with the bright zig-zag paper. I also used one of the cut-aparts that came in the kit. I had to laugh at this sentiment…my coffee cup is about 20 oz or more! So this fit! LOL The centerpiece is given dimension with foam tape, and a little is added to the cut-apart at the top so that it doesn’t get bent out of whack when it’s mailed. A few sequins finished this off. My third card reminds me of my youngest daughter…she likes her coffee, too! I love the color combinations in this card…rose, espresso brown, and cream. This is still the 2nd pattern, and I used another cut-apart. Foam tape gave the rose dotted paper dimension and I also added a puffy sticker of a coffee cup. A few sequins and this card was done.
The next three cards use Sketch #1, with a few alterations. I love the stamp with the melting snowman so two of these cards use that stamp, but the other is my favorite! I love Newton’s kitten and the donut! He is so adorable! The first card uses the Lemon Drop cardstock for the design panel, then the gorgeous plaid paper, the dark green paper, and a silver ribbon and bow. I colored the snowman in using #944 Process Red, #905 Aquamarine, #1082 Chocolate, and #916 Canary Yellow Prismacolor Pencils. No fancy coloring methods – I’m still learning….Of course, this one had to have “the” perfect sentiment – “I melt for good coffee and great friends”! The second in this set uses the same design idea, on the kraft design panel, and the brown polka-dot paper, and the coffee bean paper. This is a cutie! I used #1082 Chocolate, #1099 Espresso, and #918 Orange for this little guy. The third card in this trio used the pattern paper with all the desserts, the teal polka-dot paper, and of course, Newton’s Kitten. Life is definitely better with Sprinkles! I colored the kitten and donut by matching them to the dessert paper – #916 Canary Yellow, #944 Process Red, #918 Orange on the sprinkles, #941 Light Umber for the donut, and #1099 Espresso and #1069 French Grey 50% on the kitten. A little #929 Pink for the bottoms of his feet, inside his ears and his nose. A few sequins and this card is done.
The next trio used Sketch #4 for its designing. Using the Whip Cream cardstock for my 1st design panel, I layered the patterned paper per the design. I created a banner out of patterned paper, and a large circle – cut in half – for the designs. The first card also had a chocolate brown ribbon added to give it more “Je ne sais quoi” (yes, I had to look it up to spell it right! LOL). The main focus is the coffee cup, colored to match the circle patterned paper. I also bent the one sentiment to curve at the top of the circle for this one. I colored the coffee cup pretty simply – no fancy color layering – #1002 Yellowed Orange, #944 Process Red, #1082 Chocolate, and #905 Aquamarine. I chose the Coffee Break Marci stamp for the second card, coloring her to match the patterned paper again. I tried a little color layering to create her hair…didn’t turn out great, but it works. I used #941 Light Umber and #997 Beige for her hair…then #933 Hot Pink and #905 Aquamarine for her outfit. I think I used #927 Peach Light and #1018 Pink Rose for her skin. I used foam tape behind the plain paper, glued down the cup paper, and half glued half foam tape for the paper under Marcy. I backed her using one of the teal polka-dot papers. I also added a little square cut piece of this paper behind the sentiment. A few sequins and I’m done. The third card uses the Sno cone cardstock, a strip of the chocolate and beige polka dot paper, and the large antique..y blue polka dot paper, and then a square tipped on its side. I added a piece of the ephemera for the sentiment and a puffy stick for decoration. A few sequins and this trio is done.
The fourth trio got one wonky designed card…for some reason, I created one in landscape rather than portrait, but it turned out cute. The first card – the landscape one – used the Kraft cardstock, the chocolate plaid paper, and the paper with the foam designs in coffee cups to create. I added a small circle with the dark coffee beans, the brown ribbon that came in the kit, and another square turned on its side for the focal point. The banner portion is given dimension with some foam tape, and some are used behind the square to level it with the tag’s height. I added the woodchip coffee cup to the center, a tiny strip of sentiment, and a few sequins. The second card is in the right direction…lol…I used the coffee bean patterned paper on the Sno Cone cardstock and the golden paper with the beans and dots on it for the banner. A circle of the red squiggly paper was tucked underneath. Again, I stamped the Coffee Break Marci stamp using the Chestnut Roan chalk ink in an oval and colored her in using #905 Aquamarine, #917 Sunburst Yellow, and # 1029 Mahogany Red for her outfit. Her hair is #1099 Espresso and #1070 French Grey 30%. A few sequins and this card is done. The third card used the Whip Cream cardstock for the design panel, golden swirl paper, chocolate brown polka dot paper, and the teal polka dot paper for the design cuts. I stamped the Brew It Anya stamp with VersaFine Onyx Black ink8and colored her in using #997 Beige and #1082 Chocolate for her hair, and #1099 Espresso, #997 Beige, and #918 Orange for her outfit. I fussy cut her out…I really hate fussy cutting!… and glued her to the teal polka-dot paper. The chocolate polka-dot paper was given dimension with foam tape, and the teal polka-dot paper, I used half foam tape, and half glue to level this to the dimensions of the chocolate brown polka-dot paper. A sentiment stamped with the chalk ink and a few sequins finished this card.
When I finished these four trios, somehow, I was left with various cut strips, squares, and rectangles that were not the pattern that I cut them out for initially. So I pieced them together to create my own Sketch design (after all, SFL’s sketch sheet is meant to inspire us!). The first card used the Whip Cream cardstock for the design panel, the brown and teal coffee cup paper, the coffee bean paper, and the teal and chocolate striped paper. I stamped the coffee cup again, used #905 Aquamarine, #944 Process Red, and #1099 Espresso to color it in. The tiny sentiment “Did someone say coffee?” was stamped, using the Chestnut Roan chalk ink, up in the right top corner. (I absolutely love these color combinations!) A few sequins and two coffee beans were added. The second card uses the Lemon Drop cardstock for the design panel, two patterned papers – dark red with “café” pattern and the golden paper with coffee beans and dots – to create the base. A strip of coffee colored ribbon from my stash was added with a bow. The sentiment and focal point were stamped on a circle using the coffee cup and the “Coffee, Coffee, Coffee” stamp in the Chestnut Roan chalk ink, slightly curved to follow the circle. I colored the coffee cup using #1099 Espresso, #944 Process Red, and #917 Sunburst Yellow. A few sequins and three coffee beans completed this card. Last, but not least, the third card uses a few leftover scraps, a die-cut oval, and a sentiment from the ephemera to create. A few sequins, two puffy sticker coffee beans, and a puffy sticker with two coffee cups completed this card. Very simple and easy, but cute. I forgot to add that most of the stamped cut pieces were “edged” with Vintage Photo Distress Oxide to keep them from being so stark white against all the bright pattern papers.
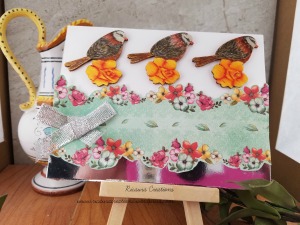
Last, but not least, I found the missing card! It’s the 4th Sketch idea and it is done on the Jelly Bean Green cardstock. This one uses the floral pattern paper, the tiny rose cross-stitch paper, and one of the cut-aparts. I layered the cut-apart off center of the white cut rectangle. It gave it a little visual adjustment, so it doesn’t melt into the background. A few sequins, a few drops of Nuvo Rosewater Crystal Drops9, and it’s done!
I hope you enjoyed seeing my creations…unfortunately, this blog post is LONG…but I got all 16 cards in! The kits from Scrapping for Less are awesome…I like the four different collections that tend to match each other, the stamps that they choose – and which add to my stash!– are also coordinated. Then they add a little bit of extras that make the kit complete. I get the Banana Split option – which comes with an extra bag of stamps, doodads, and other goodies – because it usually is an awesome selection.
Well, goodbye, good luck, and happy crafting to all. I hope your days are filled with imagination, creation, and a love of crafting! See ya next time!
Laura
***A Small Disclaimer (to make everything copacetic) – All items used in all my blogs (videos to come soon…hopefully) are (or have been) purchased with my own funds, including the Scrapping for Less Monthly Card Kit. Also, any opinion that I express in reference to any products used are my own opinion – no one told me to say it! If you decide to purchase any of the items used in my video, I will list these specific items marked with a XX mark and list it as a hyperlink below. Please enjoy crafting and you are welcome to use any of my ideas for your own cards. If you do CASE a card or purchase an item, please give credit where credit is due. Thank you all!
Supplies used are from my stash and from the SFL Monthly Kit.
I do not have any affiliation with SFL, and I don’t get paid to create cards
from their kits.
Okay, my crafty friends…ta-da! Here is a new post on some
cards I’ve been working on while everything has been so quiet on the Ricaura
Creations home front. I hope you like them! These are all the Thanksgiving
cards I created and gave to co-workers and friends. I procrastinated a lot so I
was last minute creating all of these, but they turned out good, I think! My friends
definitely liked them!
On all of my cards, I used a base cardstock A2 size from Cougar
Ultra Heavyweight 110 lb. Cardstock. I really like using this for card
bases because it’s so sturdy, it holds all of the layers and bling I might add
to a card! For the main cardstock, I used Strathmore
300 Series Bristol Smooth paper that I have precut into 4.5” x 6” for this
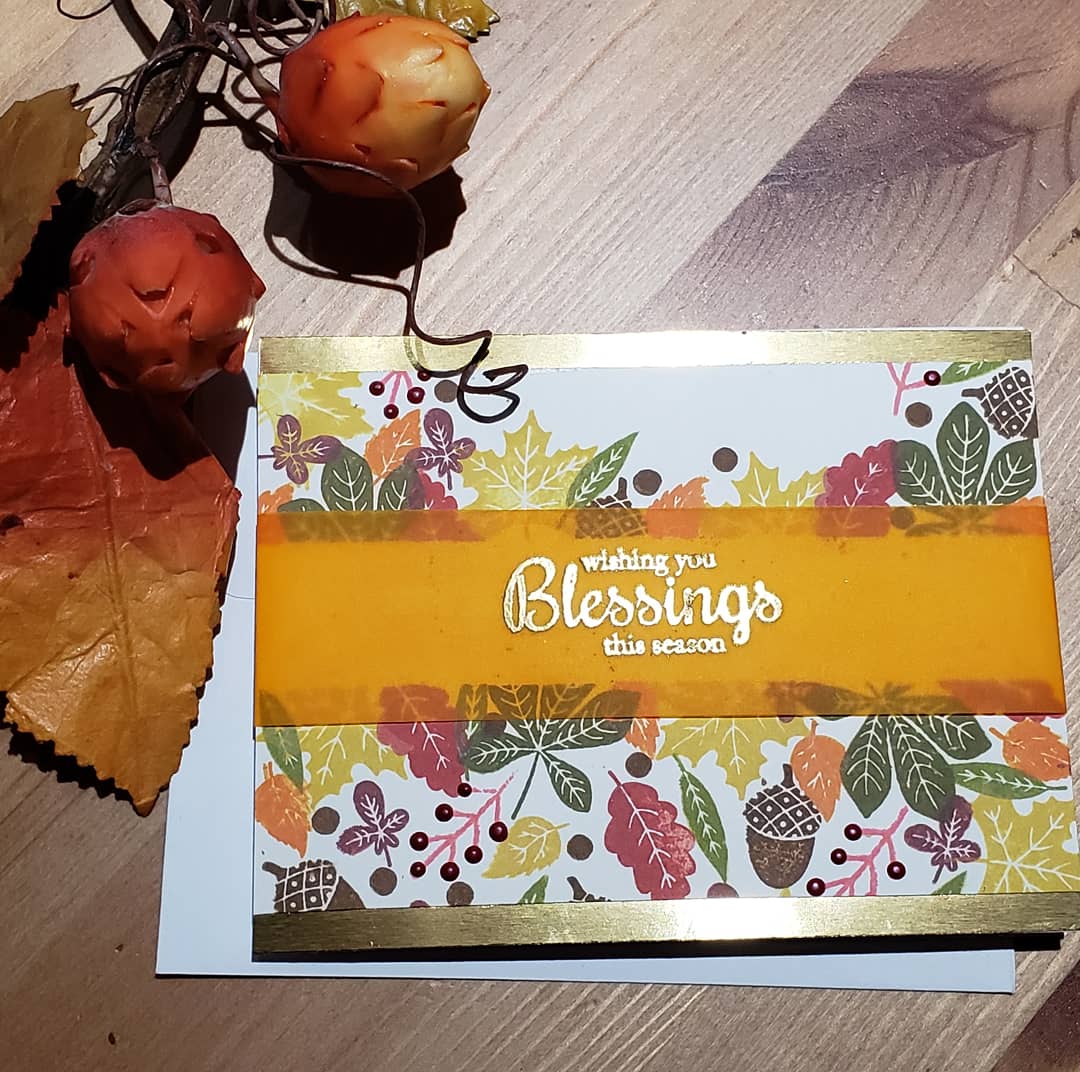
purpose. I trimmed it down to 3/5” h x 5.25” wide. The gold trim and orange
vellum were from my stash, but these can easily be found at any Michael’s Craft
Store. The stamps are from the Simon Says Stamp! November Kit “Thanks and
Leaves.” I used Ranger
Tim Holtz Distress Oxide Inks in Gathered Twigs, Aged Mahogany, Fired Brick,
Wild Honey, and Spiced Marmalade. To create the blank center, I used Painter’s
Tape and marked off the center before stamping. The orange vellum was cut
about 1.5” H and 6” wide. It was stamped using VersaMark
Ink, and embossed with Hero
Arts White Detail Embossing Powder. It’s held behind the card top with AdTech
Crafter’s Tape. Then, everything was mounted on a piece of crafting
foam for dimension, then glued to the base.
This next card started with the same card base as above in
an A2 size. The main card is a 4.25” x 5.5” card cut from a 8.5” x 11” Simon
Says Stamp Green Leaf Cardstock that came in the kit. The printed paper is
from my stash of Autumn paper and cardstock that I collect greedily every time
I come across any. Thanksgiving and Autumn are my absolute favorites, so I am
always on the eye out for anything to use for cards during this time! Anyway… I
cut a strip of the leaf paper to 3”x 5”, the piece of plaid 1.5” x 5” and the
tiny strip of bronze glitter paper about .25” x 5”. I also cut a piece of the
bronze glitter paper 2.5”x1.5” and a white card 2.25” x 1.25”. This was stamped
with a sentiment from the Simon Says Stamp November 2018 card kit in Walnut Stain
Oxide Ink. This all was mounted together as seen then glued to the green leaf
cardstock. The gold leaves are from a previous kit…I’m sorry, I really don’t
remember which one… and the dots throughout are Nuvo drops in Woodland
Green, Dark
Walnut, English
Mustard, Ripened
Pumpkin, and Autumn
Red.
For this card, I got a little adventurous! I got out my Hero Arts Liquid Watercolors in Dandelion, Moss, Orange, and Mulled Wine. I dropped a few drops of each color on Canson XL Watercolor Paper. Then sprayed it with water. I have a die in my stash that cuts out 4 maple leaves in a perfect row or the loose leaves…depending on how you use it. I die cut the leaves in a column on Strathmore 300 Series Bristol Smooth white cardstock to the left of a piece cut 3.5” x 5”. I glued a strip of the watercolor paper behind the cutouts, and glued thin strips of a pattern cardstock and a gold glitter cardstock from my stash, then mounted on the Green Leaf cardstock. A strip of orange vellum stamped with the sentiment in Versamark and heat embossed with Hero Arts Gold Embossing Powder, then was attached on the reverse side of the Green Leaf cardstock. A few dew drops from Honey Bee finished off the card.
The next card was started the same – with the Cougar A2 size
card base. A piece of white cardstock was used to build the card. A 3” strip of
pattern paper, two .5” strips of pattern paper, and a .25” strip of gold glitter
cardstock was used to make this card. This was all glued directly to the white
cardstock, then glued to the card base. A strip of white cardstock was cut to
3.5” and flagged on the end, then stamped with the sentiment in Walnut Stain Distress
Oxide Ink. A few drops of Nuvo drops here and there completed this simple card.
From my stash, I dug out a maple leaf embossing folder and
embossed a piece of 4”x 5.25” white cardstock. Then I lightly blended Bundled Sage
Distress Oxide Ink over the front. A framed 2” x 3” strip of white cardstock
and a 1.75” x 2.75” strip of alcohol inked paper were glued together and the
sentiment was stamped using VersaFine Onyx Blank Ink. A few drops here and
there of Nuvo drops, and a die cut maple leaf left over from one of the
previous cards completes this simple card. The embossed cardstock was glued to
a 4.25” x 5.5” piece of the Green Leaf cardstock and mounted directly on the
card base.
This card went in a whole new direction. I bought the Queen
& Co. Happy Harvest kit. It came with the precut acetate and foam shaker shapes,
13 dies, a 6×6 pad of patterned paper, 12 bags of toppers/fillers, and a 4×6
stamp. I loved it so much I bought two extra orders of the shaker
toppers/fillers! Really, Autumn is really – really – really my favorite time of
year! LOL Anyway…I die cut the sunflower shape from a piece of green patterned
paper from the kit, and a circle from a piece of the tan patterned paper. These
I mounted together as shown to form two shaker windows. The pearls and crystals
from the toppers/fillers bags added some bling and dimension. A piece of
patterned paper was cut to 3.5”x5” and a strip of brown cardstock .5”x 5” was
glued to the left. The sunflower shaker was centered and added towards the top
of the paper. A strip of Green Leaf cardstock and another thinner of white
cardstock were mounted together and stamped with Walnut Stain Distress Oxide
Ink for the sentiment. I didn’t add much more bling…didn’t think it needed it!
I wanted to go completely out of the box for the card that I made my boss. She’s a classy type of lady and I wanted something non-traditional for her. The alcohol inks struck again here! Using Pool, Stream, and a glitter ink by Art-C, I did some drops on Bristol Smooth paper and sprayed to spread it out. It didn’t turn out bad…I was afraid it wouldn’t work on the Bristol Smooth paper, but it did okay. A little warped but still worked. The glimmer ink gave it a bit of a shine which is really pretty. I used the maple leaf die from my stash and cut it out of another sheet of Bristol Smooth paper. I glued a strip of the inked paper behind the die cuts and mounted it all on a piece of 4”x 5.25” cardstock from my stash that matched the colors I was using. A 2”x 6” strip of blue vellum stamped with the sentiment in Versamark Ink and heat embossed with Stampendous Frantage Aged Teal Embossing Enamel, then was mounted towards the lower center and glued behind the blue cardstock. This was all mounted on the white card base. A few clear crystal gems completed this beautiful card. Needless to say, my boss loved it! LOL
For this card, I had a little fun fussy cutting the pie, pie
slice, pumpkin and coffee cup from the pattern paper I had in my stash. I
mounted these little pieces on foam tape. Then I cut a 1” strip of brown and
yellow plaid paper, a thin strip of gold glitter paper, and a 3”x5.25” piece of
the pattern paper. I mounted these together as shown. A 1.5”x6” piece of orange
vellum paper was mounted slightly below the center and glued on the back. This
was mounted on a piece of grey cardstock from my stash then glued to the A2 top-folding
card base. The little bits I fussy cut were then mounted around a thin strip of
white with the sentiment stamped on it then glued to the orange vellum. A few brown
and orange crystals were glued to the front to finish off this adorable card!
Last, but never least, my final card was for my dispatcher.
She’s a long-time friend and I adore her. I started with a piece of grey
cardstock and stamped the whole background with the stamps from the Simon Says kit
in the same colors of Dioxide Ink as before. I added little dots in the
background to fill in the open spaces. I then cut the cardstock at an angle. Two
strips of bronze glitter cardstock were glued to each portion. I stamped the
sentiment in the valley between the two pieces in Walnut Stain Oxide Ink, then
mounted the two pieces with craft foam and glued them directly to the A2 top-folding
card base. A few drops of Nuvo here and there finished this simple but elegant
card.
Well, there you have it! My first post in a long, long time,
but I hope it was helpful to you and that you enjoyed my descriptions – as well
as my cards! Let me know what you think and tell me which your favorite was. I’m
torn between two or three! LOL Thanks for stopping by and reading my post. I
hope you have an absolutely wonderful day!
Hi, guys! Sorry its been a while since I posted anything. We’ve been getting ready for the Passover season and had tons of things to do before it started. Today actually marks the last day for us, so I’m back to work tomorrow and hopefully back to blogging as well. I have finished some things during the spring break from work, so go over and check out my YouTube channel to see the unboxings I have posted. I have a few more to do, but I wanted to get them up and running as soon as possible.
I am finishing up editing the video for the Simon Says Stamp kit and I will upload it day by day. It’s a new project for me and I am hoping it will work better for me than sitting and working on one video for all 10 cards. This project is called “2…4…6…8…CREATE!” and I will do two cards a day for 5 days. It takes up less time video taping and you don’t have to sit through over an hour for one video. Hopefully, I can keep it below 30 minutes to start, but my goal is only 15 minutes each day – maybe even 10? I have some kinks to iron out, so the first are a little long, but still…progress! As soon as I can take pictures of the cards from the Simon Says kit, I will post a blog on their creation, even though I am uploading the videos for that kit as well. Hopefully, I can get back into the swing of things and get one kit out a week. Here’s hoping…..!
I wanted to post the links to my unboxings that I have uploaded so far so….
Simon Says Stamp – https://www.youtube.com/watch?v=InnjZ2Jdw9o
Let me know how you think I did and please like, subscribe, etc. if you liked what you saw! I will be back on Wednesday evening to post here so I’ll see ya then!
Hi, fellow crafters! I had filmed an unboxing for the above mentioned kit, but the whole time I was recording the Simon Says Stamp kit, one for Love from Lizi March 2017, and one for My Creative Scrapbook March 2017…the stupid thing said it was recording but actually wasn’t properly recording…or something. I could see the videos on the disk, could download them…but couldn’t open them. For some reason there was an error in the recording. I am getting so frustrated with this video cam, but I can’t get a new one at this time! So…back to plain old typing a blog! But ho, hum…it gets the job done, right!?
Well onto better things! Since I don’t observe Easter, it was quite a challenge for me to create 10 cards with a Spring theme from an Easter themed card kit! But once I got started, the juices just got flowing and I got creative! I cut all the cardstock that came in the kit to create 10 card bases. There is Slate, Ivory, Orange Peel, Green Apple and Bright Yellow cardstock in this kit.
For my first card, I wanted to do a shaker. I love the paper from Doodlebug…I think I love everything from Doodlebug!…and I wanted to use the adorable bunny stamp. I also had some tulips in my stash that were the right color! I cut a frame from the plaid paper and using double thickness foam tape, I surrounded the edges after tacking down the acetate. Using the Bright Yellow card base, I positioned the flowers to the right side of the area that would be the frame and I scattered some springtime colored sequins that I created (to be in the my future store! “Bug’s Bling and Bits” Springtime) and loaded quite a bit over the tulips. I had stamped and colored a few bunnies the day before and fussy cut them out, so I chose one for this card and using glue dots, positioned him in the lower left corner. I cut a banner out of pink cardstock from my stash and stamped “You’re some bunny special” from the kit. I used some clear drops from Pretty Pink Posh to top off the top of the banner to add a little bling then glued it down. I like it but there is room for improvement. I think in the future I will do something different with the banner but at this time, I don’t know what. Anyway…here’s the first card!
For the second card, I cut the piece of yellow patterned paper with the little white daisies on it. I rounded the corners and glued it down on the Green Apple card base. I had some embellishment flowers that were kind of “hippy” in my stash and I thought they would go perfect for this card. I glued down three flowers – using the card base horizontally…and then cut two banners – one out of white card stock and one out of the green dotted paper from the kit. I overlayed them, stamped my message, and using foam tape glue it down on the top left corner. I added some yellow sequins from last year’s SSS kit. There is a little bunny popup with some more hippy flowers inside. I die cut “hello” out of the daisy paper and this made the interior of my card. Here is card #2!
For card three I wanted to use the sheep patterned paper that came in the kit, so I die cut a piece of white cardstock using a dotted rectangle die. I created a sky and a pasture using Stormy Sky and Mowed Lawn distress inks. I die cut a few clouds from white cardstock and stamped “hello ewe” from one of my stamp stashes. From my stash (Mama Elephant’s Lunar Animals) I stamped and die cut two lambs. My daughter and I love black-faced sheep so I tried to imitate one and the other lamb is a typical black sheep. I die cut some grass from green cardstock and placed the lambs in the “pasture”. With the lamb paper, I die cut a larger rectangle using a larger dotted rectangle from the set, which I then glued to the Slate card base. I popped my scene up with some foam tape and glued this in the center of the lamb paper. A few swipes of my Wink of Stella over the clouds and a few clear drops from Pretty Pink Posh and that was my 3rd card.
My fourth card got a little of a rough start…I forgot to use watercolor paper when I created the background. I sponged Mowed Lawn and Stormy Sky distress ink over the whole piece of white cardstock. I then sprayed it with a mister filled with water and Perfect Pearls. Because I didn’t use the watercolor paper, when I returned to check on whether it was dry or not, it was warped…lesson learned…I hope! I die cut a planter pot from brown cardstock, and flowers from the patterned cardstock in the kit (the yellow with white daisies and the pink with flowers) and die cut stems and leaves from the green dotted paper. I popped up two of the flowers and glued down the other two directly on the paper. The center of the flowers are some dew drops from Honey Bee Stamps…the sunflower dew drops…as well as the three scattered on the background. A sticker from my stash completed card four!
Card 5 is on the Orange Peel card base. I used the pink floral paper from the kit and die cut it using the dotted rectangle die I have. I had some more of those “hippy” flowers in my stash, so I created a “garden” from three of them. I die cut a cloud out of white cardstock, stamped “have a great day” in hot pink ink and popped it up with some foam tape. A few clear drops and another hippy flower completed the card. This one was very easy!
For card 6, I wanted to use the chick in the stamp set, but I didn’t want a regular “chick”, so I colored it blue (blue bird!) and fussy cut it out. I used a embossing folder from Darice that was full of flowers and embossed the Bright Yellow card base with this. I have a die set that creates bird houses and tiny birds, so I cut them all out of white cardstock and colored them to look like wooden bird houses. The tiny birds I colored blue to match my chickie. I finger-smeared the turquoise mousse to create a sky, and the silver mousse to create some background clouds on white cardstock. Then I die cut two white clouds, stamped them with my sentiment and popped them up over the silver clouds. I cut out a strip of flowers from one of the patterned papers and glued this to the bottom of my “scene”. I popped it all up with foam tape and glued it down onto my card base. A few blue crystals dotting the sides of the card base and that was my sixth card.
My seventh card is for someone very special…my five-month-old granddaughter, Frida, in Scotland! She’s my first granddaughter from my first daughter. I know she doesn’t understand it, but I just had to create one for her and send it to my daughter to save in her memory box. I die cut the carrot patterned paper using the dotted rectangle die and die cut a strip of grass from some green card stock. Another one of the bunnies I colored and cut out the day before was popped up on a circle wobble to make it bouncy. I used googly eyes for the bunny to give it some character! LOL I cut a strip of the green dotted pattern paper, stamped my sentiment “some bunny far away is missing you” and popped that up with some foam tape. A few sunflower dew drops from Honey Bee Stams for color and the whole was glued down on the Green Apple card base. I can’t wait to send it to Frida!
There is another “hippy” type of pattern paper in the kits – a turquoise with white daisies that I used for the eighth card. I die cut the paper using my dotted rectangle die, then glued it to the Slate card base. I cut a piece of white cardstock, rounded the corners and stamped two sentiments…”sending lots of love”…and “cool chick” and the chickie stamp in black VersaFine ink. I colored the chick the typical yellow of chicks, then I die cut “HUGS” from the orange pattern paper. I also stamped the sunglasses on a piece of scrap white cardstock, colored it in and fussy cut them out. I popped the sunglasses up with two circle foam dots and glued them over the chick’s eyes. Using my black calligraphy pen, I added “&” and “to a” to finish the sentiment – “sending lots of love & HUGS to a cool chick”. I popped the white cardstock up on the daisy paper then glued both down to the Slate card base. I had some orange Stickles and I dotted some of the daisy centers for added color and to tie in the orange “HUGS”. That was my 8th card!
My ninth card is using the Orange Peel card base. I die cut the beautiful plaid pattern paper using my dotted rectangle die and popped it up with foam tape on the card base. I created a envelope from the green dotted paper (which had the carrots pattern on the reverse side) and popped that up with some foam tape at a little angle. I cut a tiny rectangle from the die set and stamped my sentiment “just saying hello” and tacked this down inside the opening of the envelope. Some green pearls and lady bugs from my stashed finished this simple card.
The purpose of my tenth card was to use up my scraps left over so nothing went to waste. I cut out 1/2″ strips from the scraps and glued them at an angle to a piece of white cardstock. I then cut the glued cardstock in half. I really wanted to use the little bunnies border, so I glued that in the center of my Ivory card base. Two strips of the blue cross paper on the sides and then popped up my strip card pieces above and below the bunny border. I added some orange Stickles in the center of the white daisies, other flowers, and the dots on the zigzag paper. I added some pearl drops in the center of the flowers in the bunny border. Another simple card but with lots of color! I didn’t add a sentiment because I didn’t want to take away from all the color and patterns, so when I decide to send it, I figure out what sentiment I want and stamp it inside.
So, that is my 10 cards – 1 kit from Simon Says Stamp! March card kit! It was a challenge but I succeeded in making 10 cards with a Spring theme! LOL They turned out pretty good and I can’t wait to use them! Sorry the photographs aren’t the greatest. I am trying to create a better photography light box, but I just can’t seem to get the exposure right. I’ll keep practicing!
I hope all of you have a wonderful crafty day! Take care and see you on the flip side!
Just wanted to let you all know I am still alive and kicking! LOL I got sideswiped with the flu and bronchitis! Its taking longer than usual to get well enough to do the things I want to …much less those that I have to! I’ve been working on a little bit throughout this recovery period…I started my 10Cards-1Kit for the SSS March 2017 Kit; an unboxing of MyCreativeScrapbook for March; an unboxing of LFL March; and a haul from Michaels, MFT, and STAMPlorations…plus more that I just can’t remember! My workroom is a disaster because of all the work and no cleaning behind myself, so I am taking a few days to clean up and reorganize… unfortunately the pictures I took won’t upload…not sure why. We got a snow day – more of an ice day – from work and school, so I’m going to try to get as much done as I can. I’ll try to get it all uploaded today and this evening.
I am also in the process of licensing my “business” as Ricaura Creations. I want a shop online that I can sell things, plus access affiliated links. Keep your fingers crossed! It’s a lot more confusing than I expected!
Well, back to the worktable. Have a great day crafty friends!
Hello, crafting friends! I am one of the stops on the Love from Lizi blog hop to showcase an awesome product – Love from Lizi monthly kits! Her kits are simply amazing, filled with beautiful supplies, and she just went “subscription” for her kits! Elizabeth is a new entrepreneur and has been around a bit in the card making world. She has asked a bunch of us to participate in a Spring Blog Hop and is offering a free kit or £20 for someone special! Please leave a comment on my blog and all the other bloggers in this hop! So without further ado…
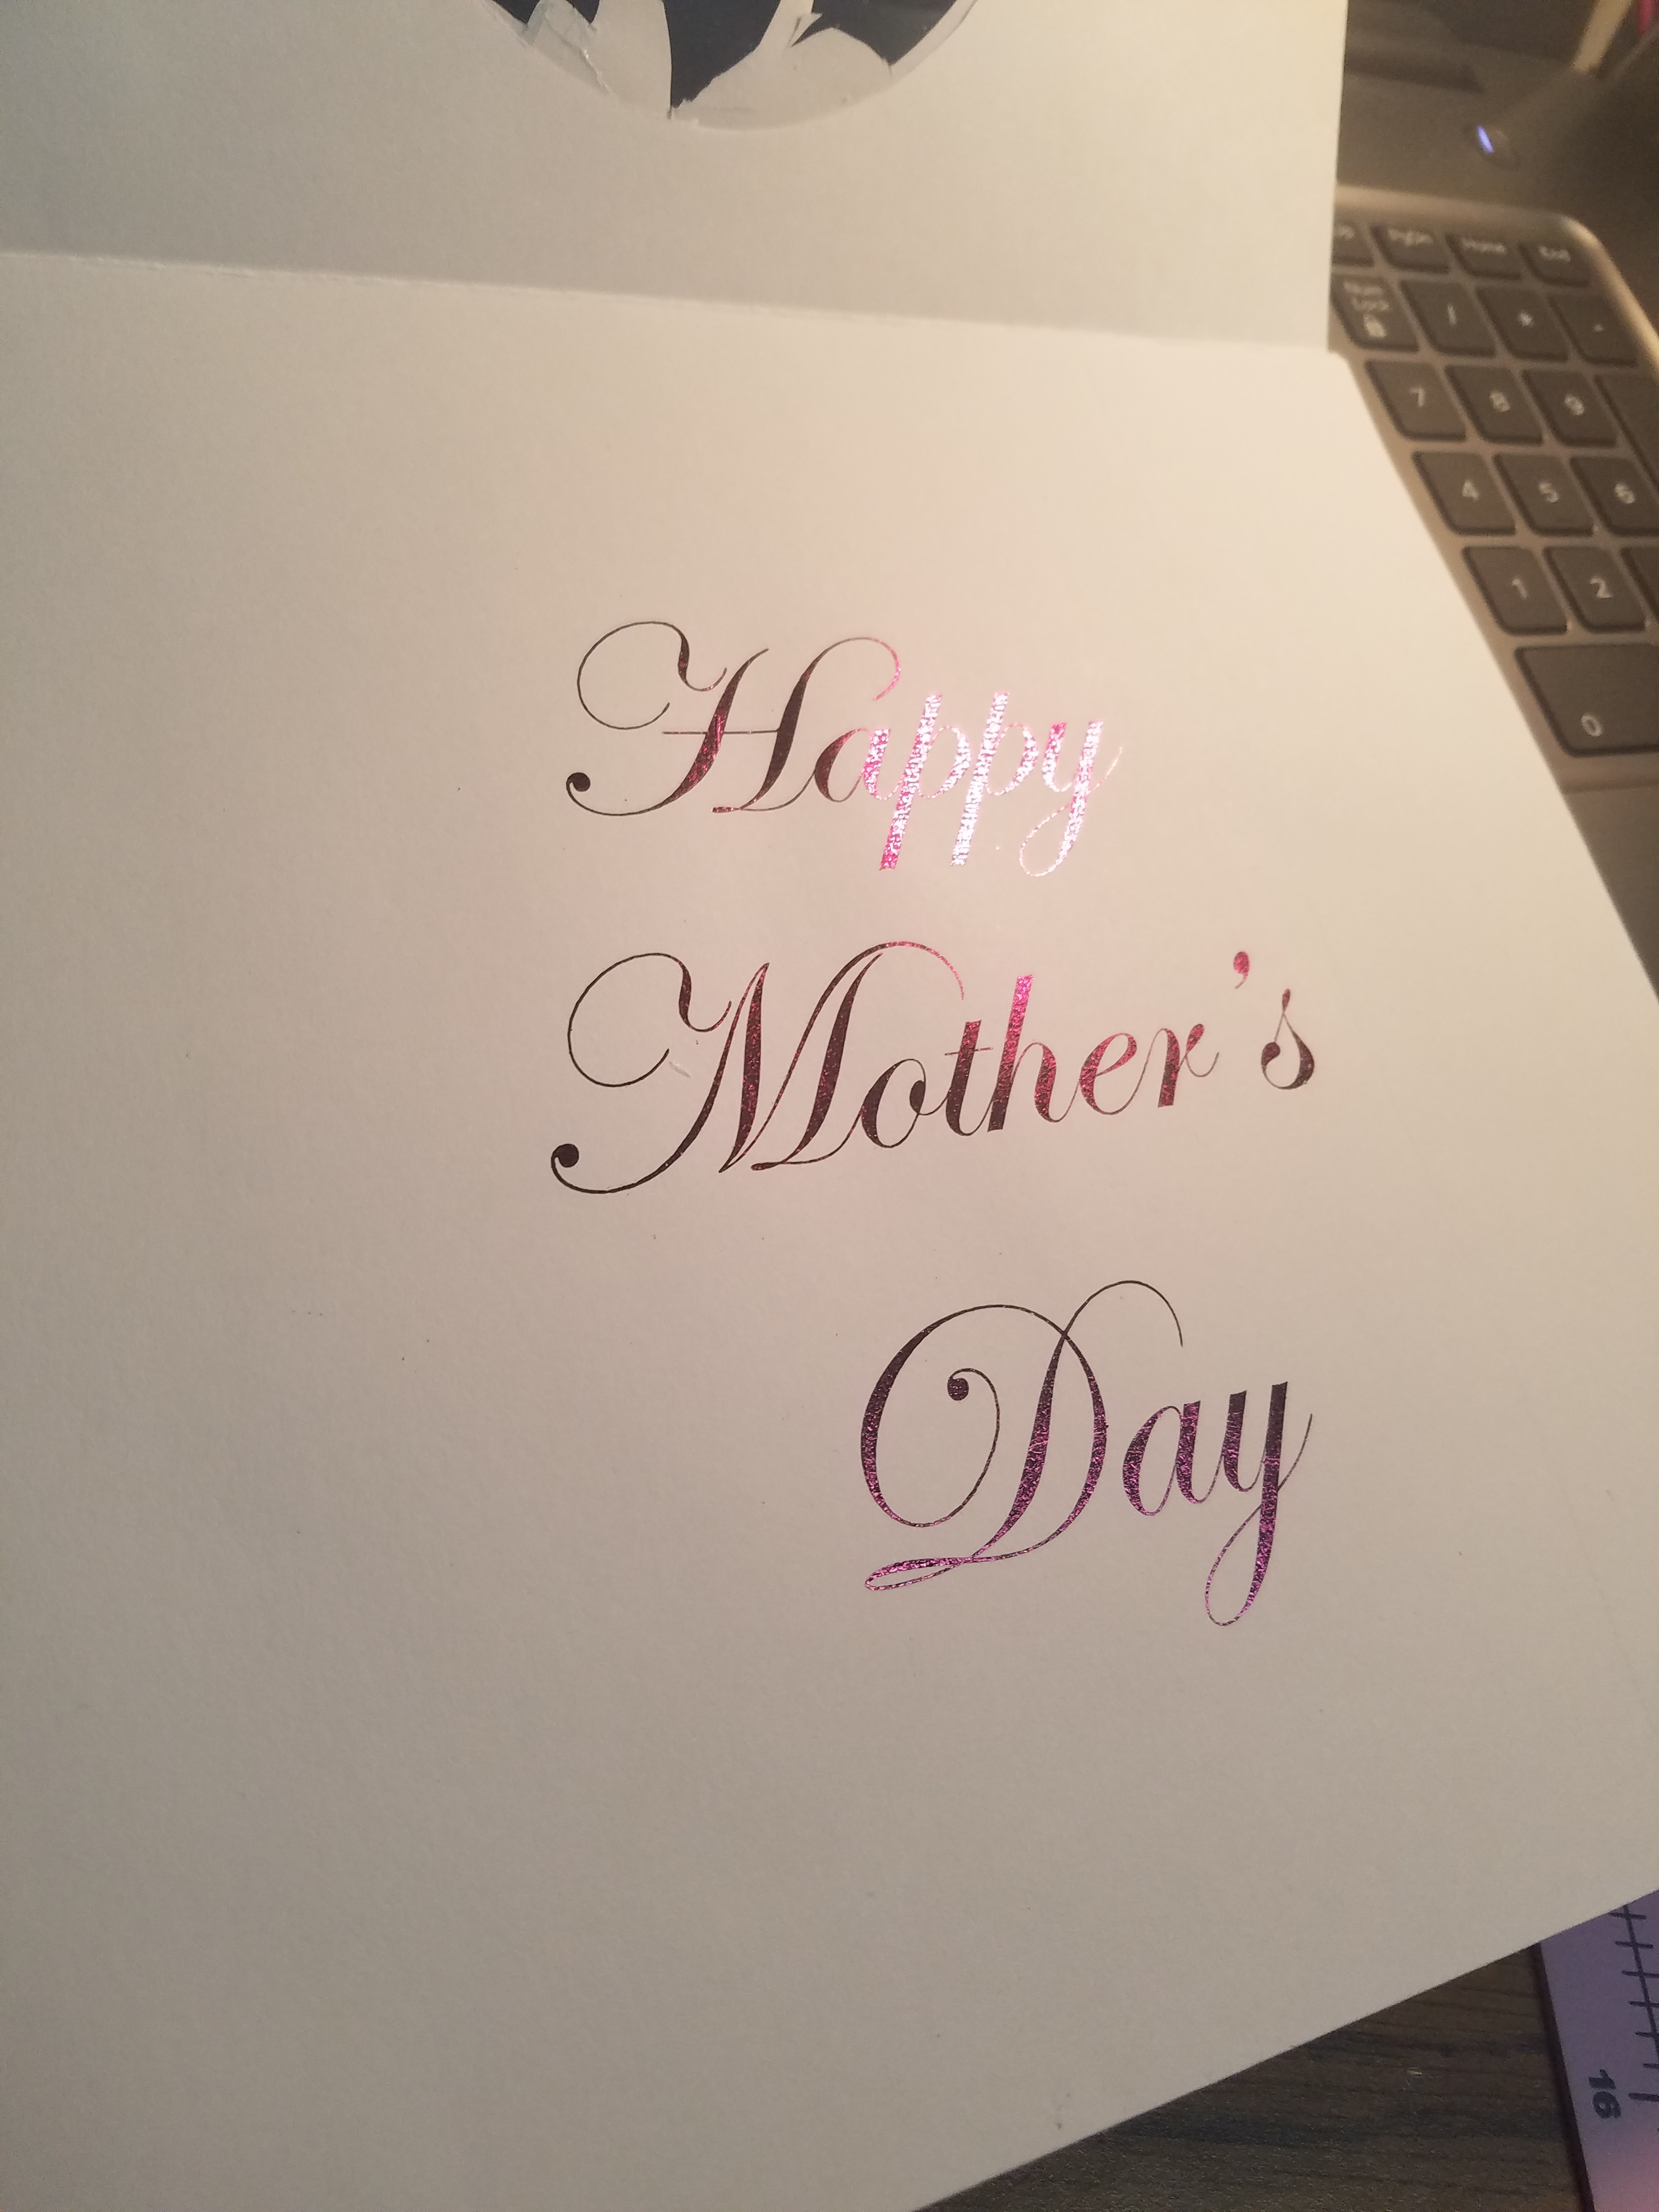
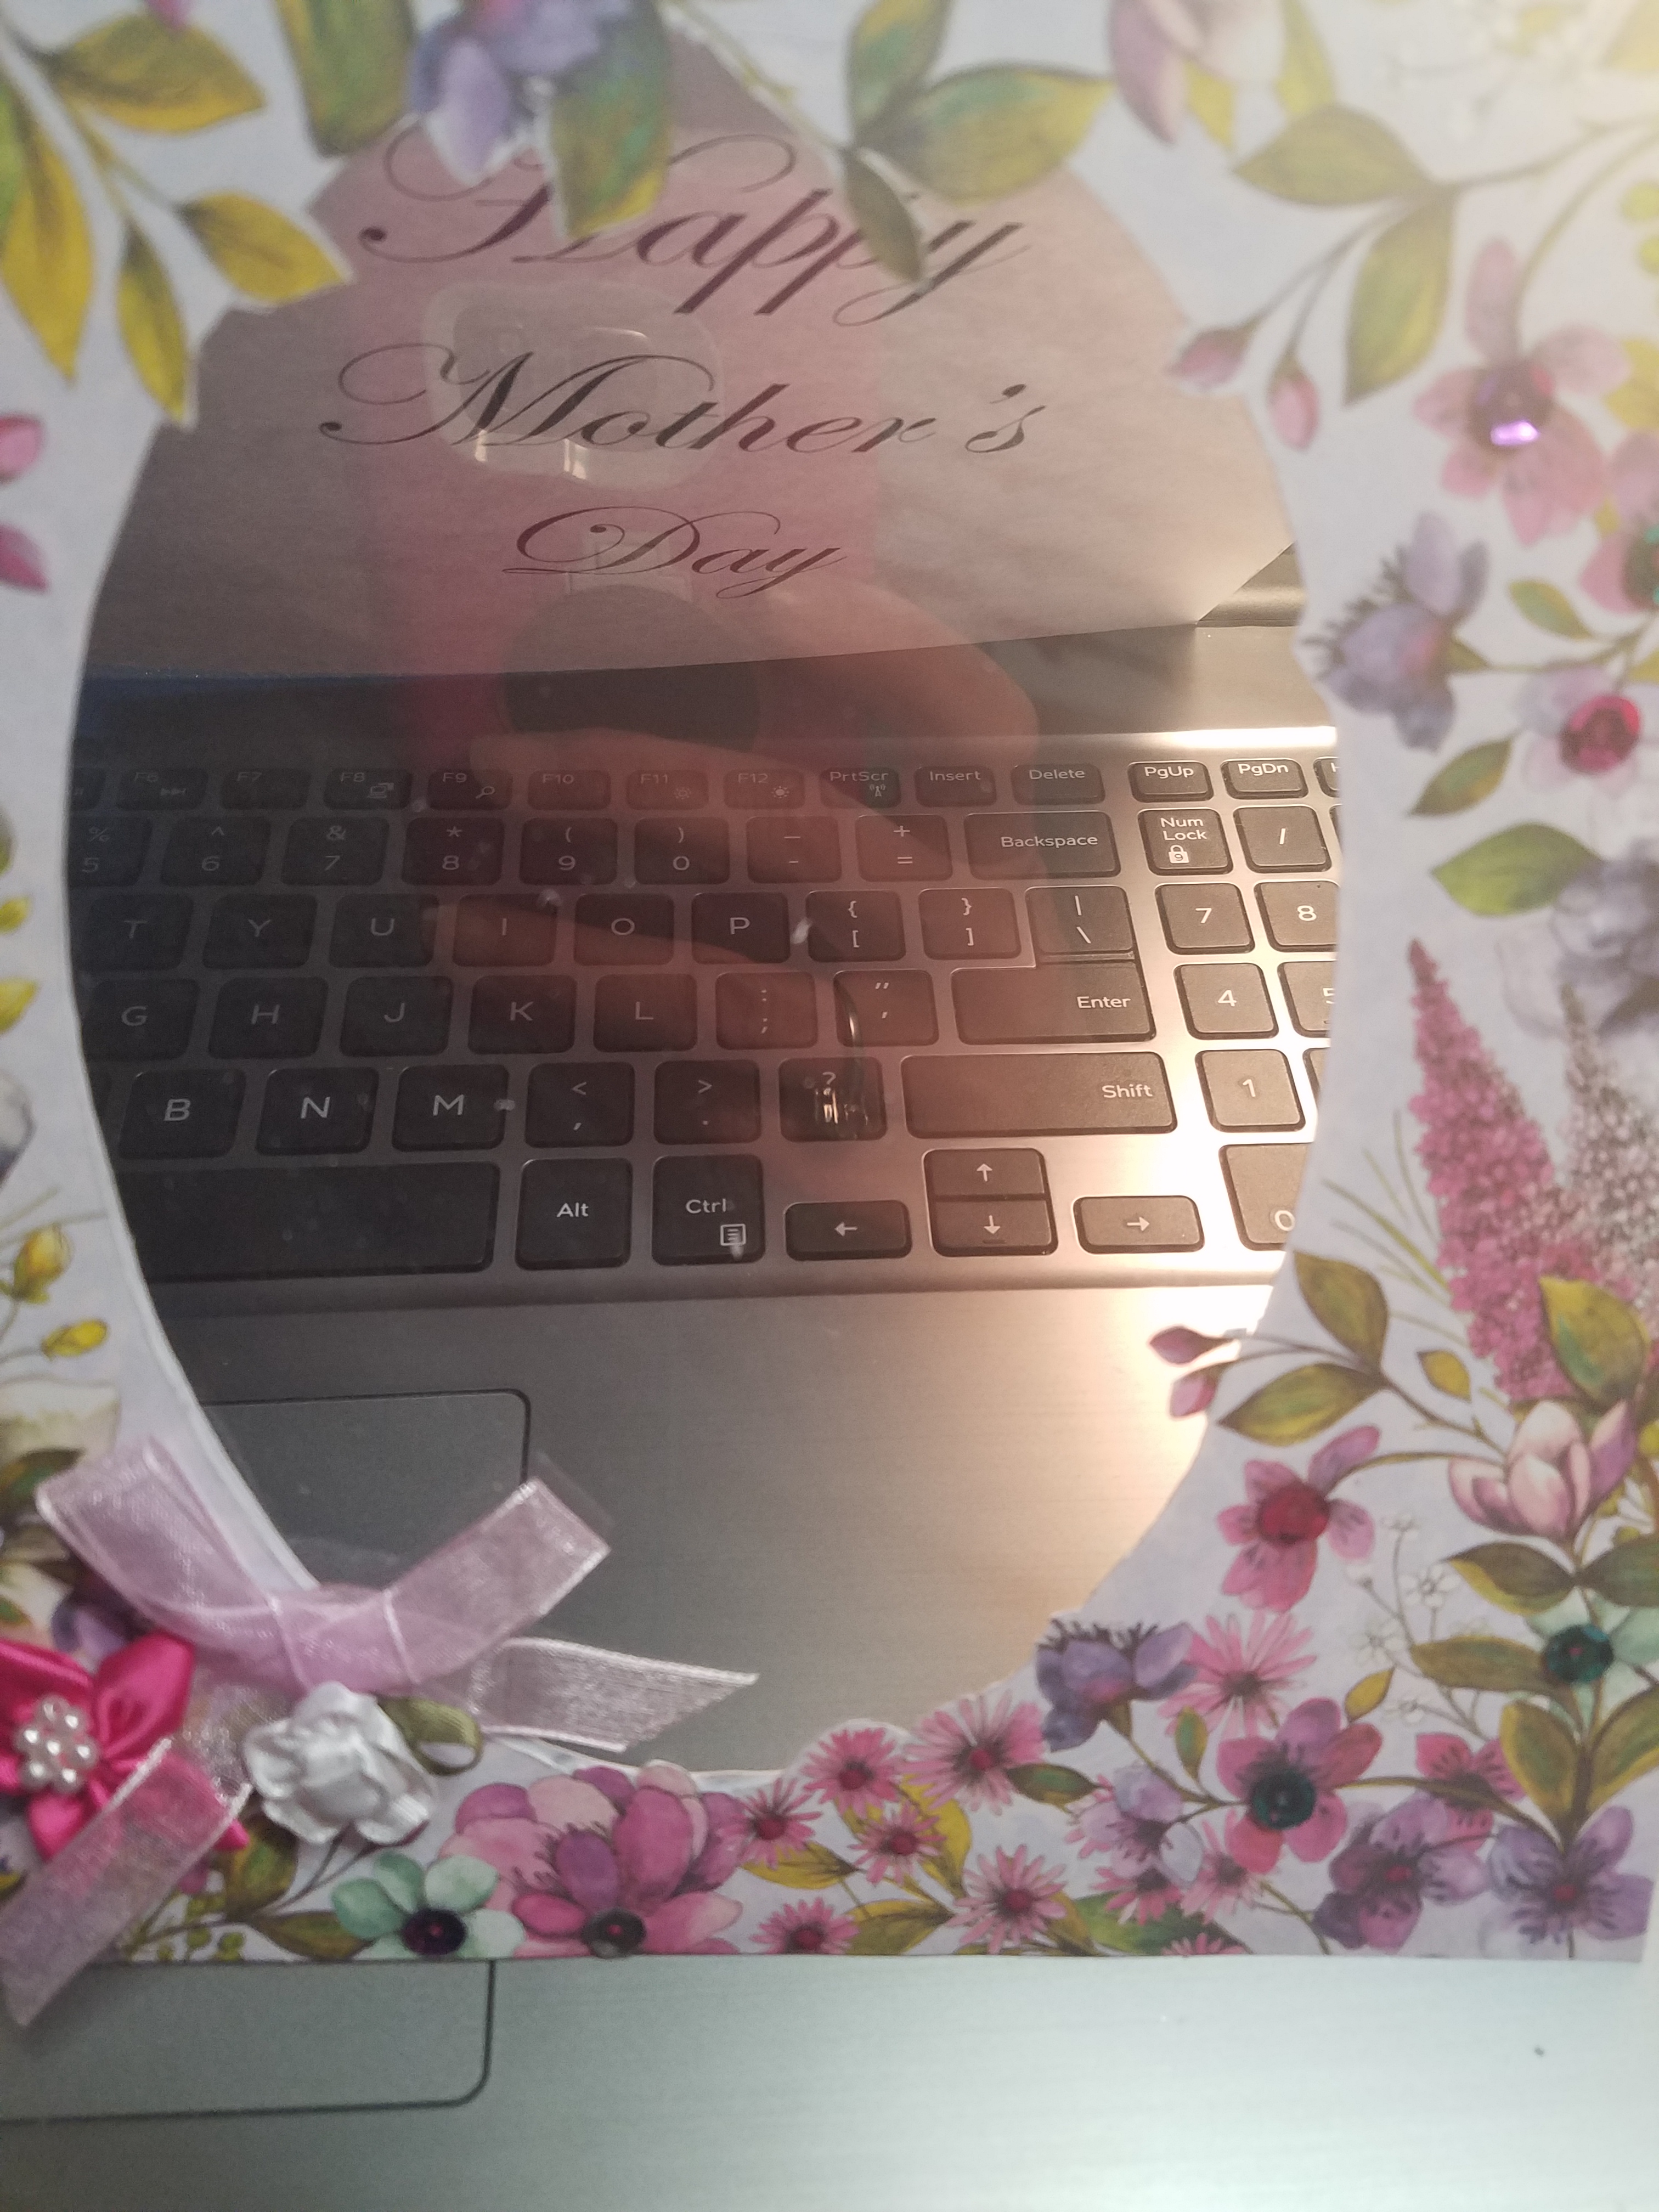
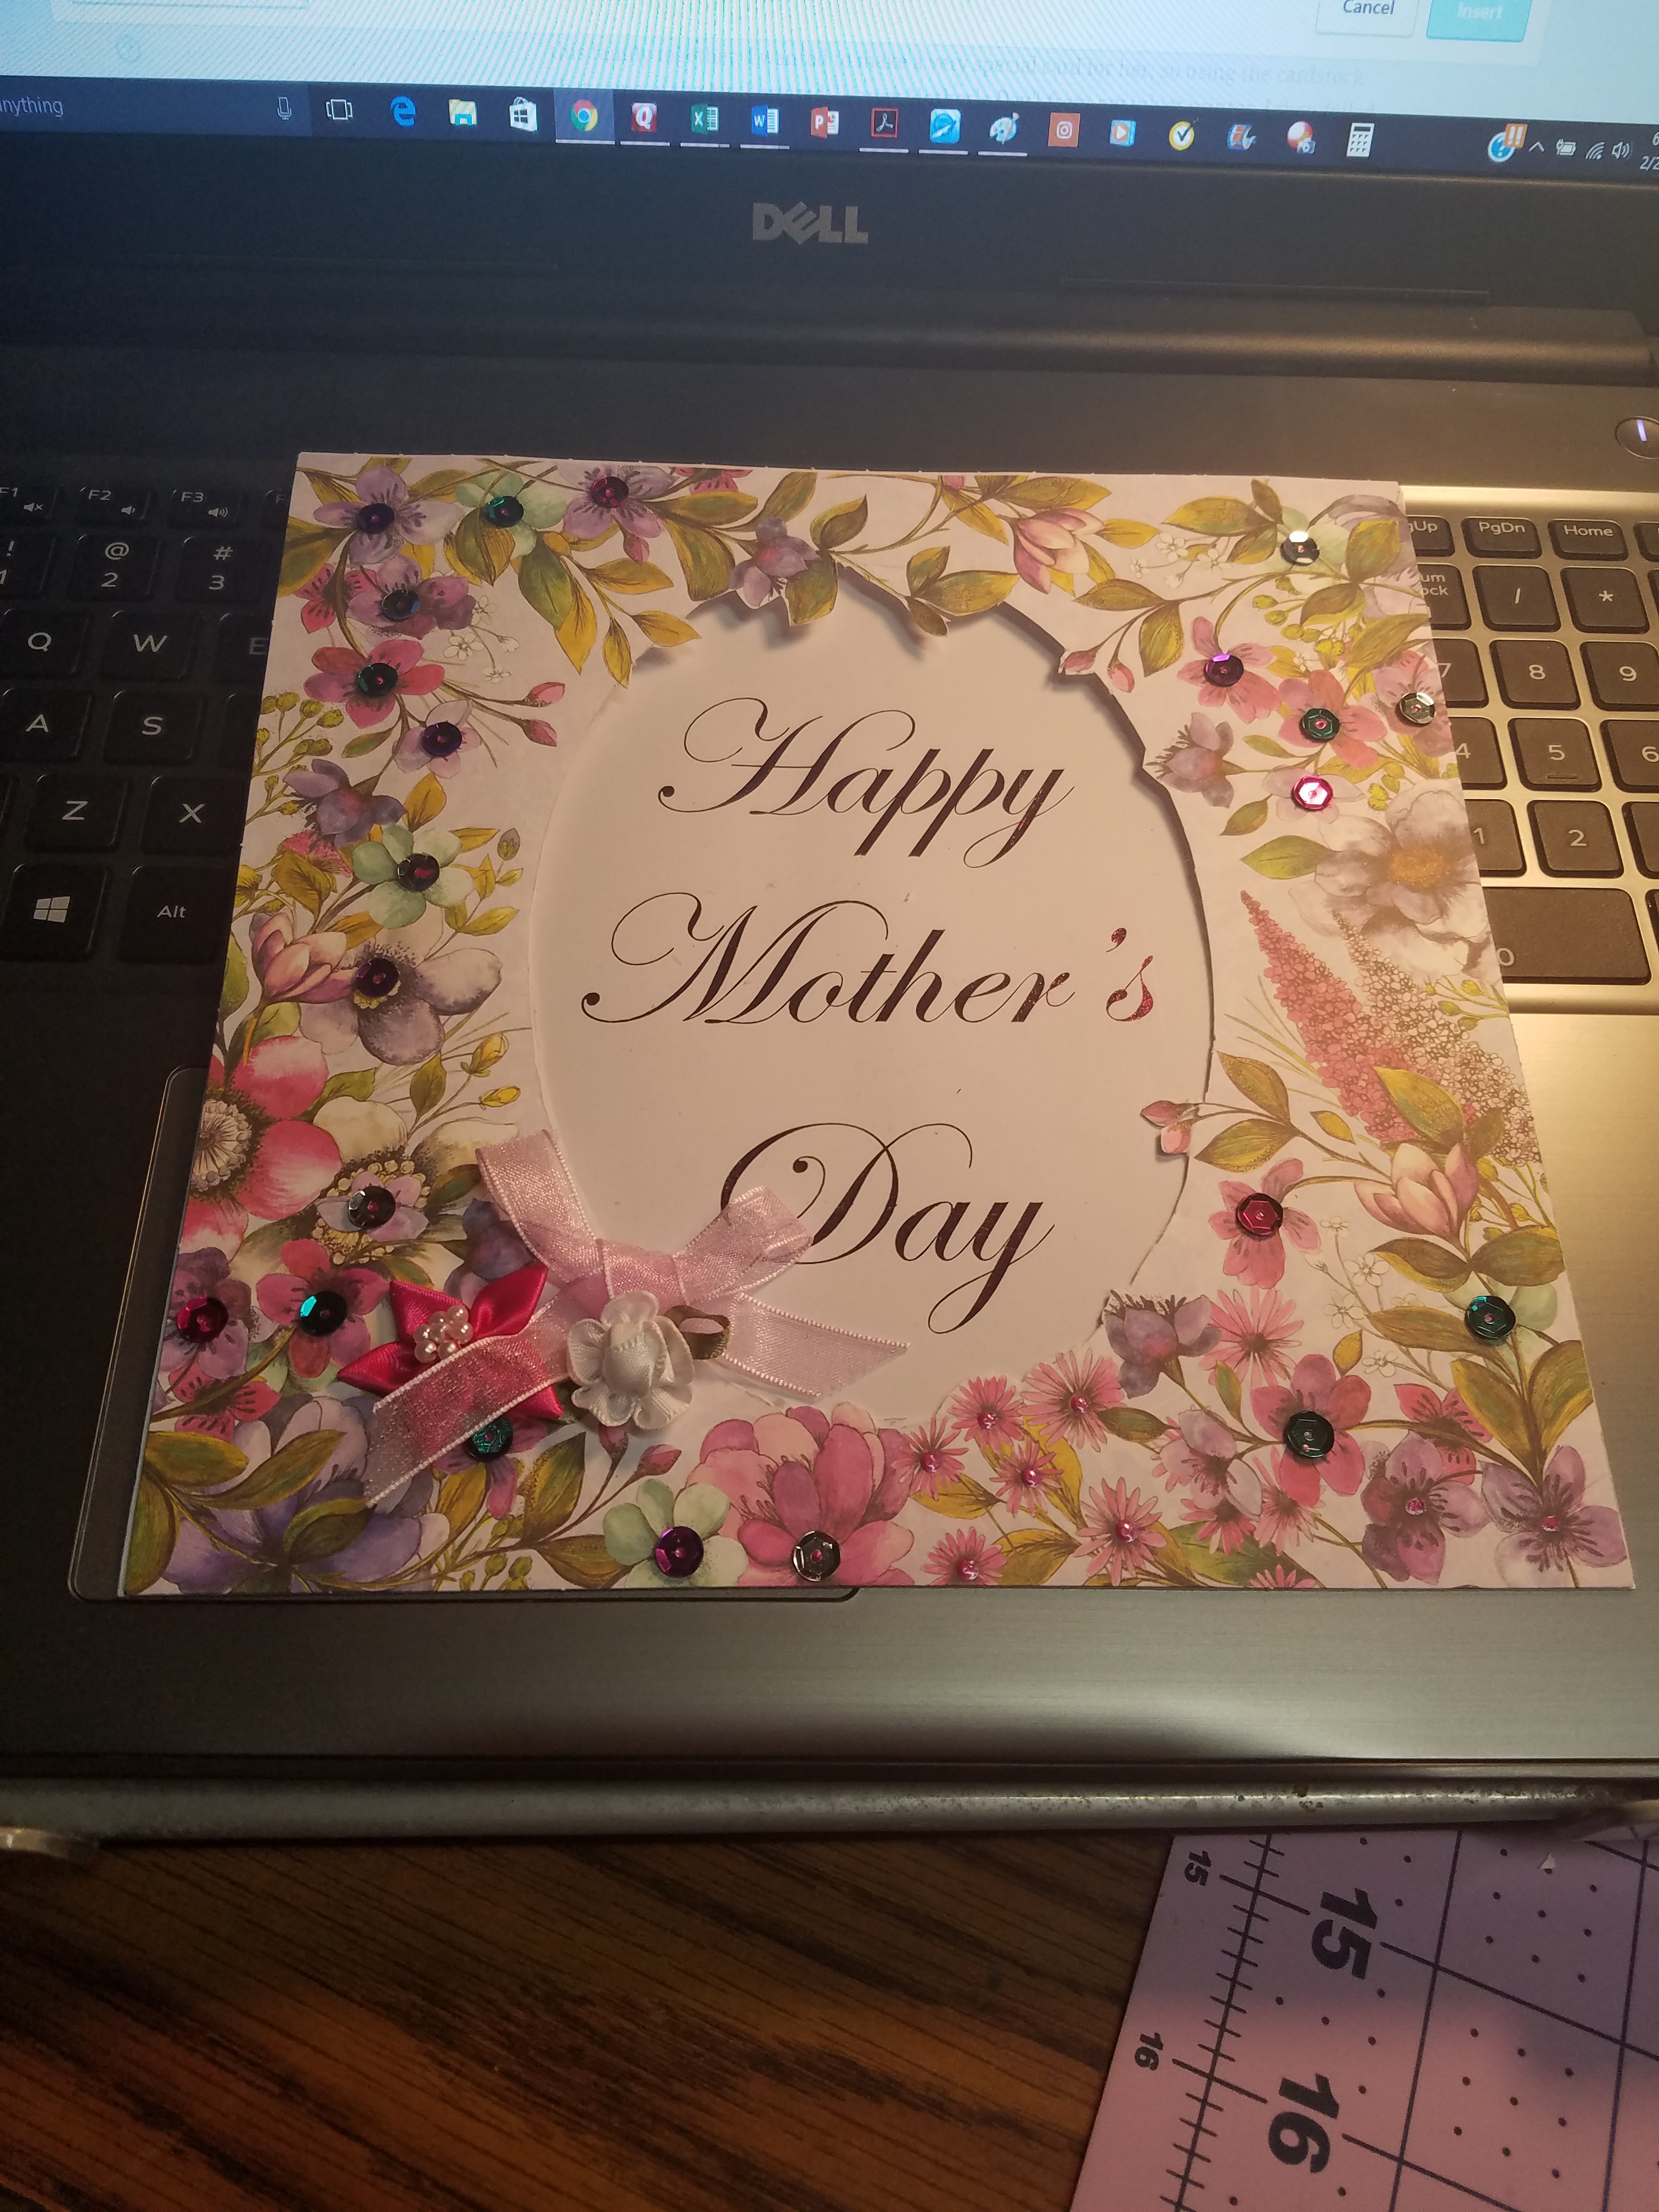
This card was made using materials from the February card kit. Elizabeth is located in the U.K. so they will be celebrating Mother’s Day next month. Her kit reflects that season of Spring and the celebration of Moms around the world! The patterned papers in the kit are all 8″ x 8″ and jokingly, Elizabeth challenged us to make an 8″ x 8″ card…so I did! I still made a Mother’s Day card…I actually made 10 more from the kit, but I’ll post those later. This is the special card for this blog hop….it’s for my Mom, who is an awesome lady and I love her to death. I don’t tell her near as much as I should, but she’s the thread that ties this family together. I wanted to make a very special card for her, so using the cardstock that came in the kit, I printed “Happy Mother’s Day” from my inkjet printer. I then foiled it using my laminator. It’s a beautiful fuchsia pink.
Then using the beautiful floral print paper in the kit, I fussy cut around some of the flowers in the center to form a window, which I glued a piece of acetate to the back of. You’ll notice that some of the leaves and flowers “hang” into the oval centerpiece….I thought it added a pretty touch!
Since I am doing an 8″ x 8″ card, I used one piece of cardstock for the back panel, and one piece for the card base – that the patterned paper is glued to. I cut both cardstocks 8″ x 10″, then folded over the extra 2″ to form a piece that can be glued together – forming a top folded card. I cut an oval out of the front card base so the window goes all the way through to the inside.
Then I added sequins and ribbon from the kit and a few silk flowers from my stash! The sequins are “glued” down using the Nuvo Crystal Drops in Rhubarb Crumble, so the center of each sequin has a little drop of the crystal drops squeezing through! LOL I think it turned out quite nice and I really hope my Mom loves it! I plan to make my own envelope using a tutorial from one of the other bloggers that made envelopes for her 8″ x 8″ cards! I will be using wrapping paper for this. Here’s the finished card!
I hope you like my card and you will hop right along to the next awesome card in the blog hop…that’s Crazy Paper Chick’s blog and she’s awesome! You’ll love her cards, too!
Have a great day, crafting friends, and enjoy every stop on the Spring Blog Hop for Love from Lizi! Don’t forget to post a comment on each stop so you’ll have a chance to win the soldout March kit or £20 from Love from Lizi! You can find the shop at Love from Lizi. Head over there after you visit all of us in the hop!
Well, guys…we are just finishing up the final stuff for the Spring Blog Hop for Love from Lizi. Remember to check out my blog on March 1st, 2017 at 10:00 am when I go live, as well as all of the blogs on the hop – then leave a comment so that you can enter to win a sold-out March kit or £20 to use in her shop! I love the stuff in her shop…just keep buying and buying…LOL
But onto other things still going on. I am finished with my 10 Cards – 1 Kit (plus 1 special card for the Blog Hop) and without any more fanfare…
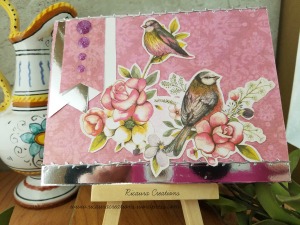
Card one – this card is a side-fold white cardstock but on the narrow end…one of those “oops, the card’s turned wrong! Oh, well..” moments. But it still turned out beautiful. The beautiful rose damask paper from the February Love from Lizi kit is the background. I fussy cut the birds and floral arrangement out from one of the other papers in the kit. I was going to stamp “Happy Mother’s Day” on the strip of silver mirror paper at the bottom, but it didn’t seem to work the way I wanted it to, so I just left it blank. I edged the patterned paper along the seam with the mirror paper using the branch pinstripes from the kit, and also at the top of the card. I cut three banners – one from the silver mirror cardstock, one from the rose damask paper, and one from the back of the bright floral paper in the kit…a pretty pearlescence pattern… then topped them off with graduated sparkly enamel drops in the light purple. Of course, that wasn’t enough, so I had to paint the whole bird and flower cut-out with clear Wink of Stella! It’s hard to see in the photo but it’s pretty!
Card two is a mixture of a lot of stuff from the kit. One a top-fold white card base, I glued another piece of the rose damask paper, paired it with the sparkly striped pattern paper and added a strip of the branch pinstripe at their seam. I fussy cut a peacock from one of the other patterned papers and glued that over the rose damask paper. Then I cut a square from the purple glitter paper included and a square from a piece of kraft paper (just a shade smaller), which I then stamped “Happy Mother’s Day” in the purple pigment included in the kit. A few sequins here and there and some sequin pieces glued to the peacock’s tail…and its done!
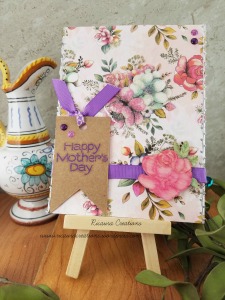
The third card was a very simple card. I used one of the beautiful patterned papers in the kit – the one with roses – and glued this to a top-folding kraft card base. I coated the center flower grouping with clear Wink of Stella (about 4 coats!) and then topped it off with Glossy Accents. I edged both sides – left and right – with the branch pinstripe. The kit came with wooden embellishments, so I used one of the roses…water-colored it from my pencils then topped it off with…guess what…clear Wink of Stella! LOL A strip of the purple patterned ribbon in the kit went along the bottom half where I glued the rose on the right side. I cut a banner from the kraft cardstock and stamped it with “Happy Mother’s Day” from the purple pigment ink in the kit. I tied off a strip of the purple ribbon in the top and glued it down on the bottom left side. Two light purple and two dark purple enamel dots finished it off!
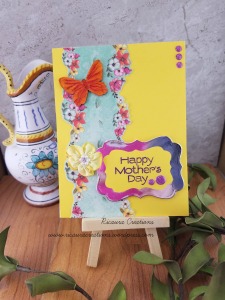
My fourth card is very bright! I used a piece of bright yellow cardstock from my stash…I can’t remember from which store and glued it down to a top-folded white card base. I fussy cut another one of the patterned papers to create a carved strip on one side. I cut a piece of the silver mirror paper with a scalloped tag die, then one a shade smaller out of the yellow cardstock. I stamped the yellow cardstock with “Happy Mother’s Day” in the purple pigment ink, then glued on top of the silver mirror cardstock. Gluing this down in the lower right corner, I added a yellow silk flower with pearls right beside it. I used another one of the wooden embellishments – butterflies – and watercolored this trying to match the orange in the patterned paper. A few of the light purple enamel dots to finish it off.
My fifth card turned out really nice, if I do say so myself! LOL I used the pearlescent floral paper from the kit for the background on a top-folding white card base. I die cut a scalloped frame from the silver mirror paper, then stamped a piece of watercolor paper with the beautiful bird and flower stamp included in the kit. I then attempted to use my new Zig Watercolor Brushes to paint the stamp. It isn’t great, but it was the first time I used them. This I die cut it to fit behind the silver frame. Another scalloped tag die cut from the purple glitter paper, and one from white cardstock a shade smaller, which was then stamped with the purple pigment ink for the same sentiment…after all, these cards are all for my friends for Mother’s Day! A few of the dark purple enamel dots finished it off. I LOVE this pearlescent floral paper! I really need to order some more! LOL
The sixth card is a top-folding card base in kraft. I glued the pale green damask pattern paper to this and edged it with the branch pinstripes on the left and right. I made a tiny envelope from kraft cardstock and glued that down. I then spent hours…and hours…and hours…no, not really…fussy cutting out some butterflies from another pattern paper in the kit. I glued them down just in their center and folded back the wings a bit to look more realistic and 3D. They are “flying” out of the envelope…or supposed to be. I didn’t like how the envelope turned out, so I kinda covered it with a square of another paper from the kit with the same stamped sentiment. Another ribbon from the kit tied in a bow, and a few more enamel dots to finish the card. It’s really pretty…
My seventh card had me a little flummoxed…I tried to do it one way, and it wouldn’t work the way I wanted it to…so I had to try to figure out another pattern. I went on the Love from Lizi Facebook page, where others are creating beautiful cards from their kits, to get a few ideas to jump start a new pattern. The results were corners cut from the rose damask paper, popped up with some foam tape and edged with the branch pinstripes on a side-folded kraft card base. Then alternated the yellow washi tape in the kit, with the purple polka dot ribbon to create stripes. I used one of the cardstock embellishments in the kit – the round one with the tiny butterflies, die cut another circle stamped with my sentiment, and popped it up in the center of the butterfly tag. Using some silver ribbon from my stash, I tied off a piece at the top of the tag. A few of the enamel dots in dark purple and light purple finished it off.
My eighth card I used a long top-folding white card base. I glued a strip of the silver mirror cardstock to the lower portion, then another fussy cut piece from the green floral paper topped this off. The three wooden bird embellishments from the kit were painted with the Zigs…a little better…then glued along the top white portion. A silver ribbon bow finished it off. I’m still contemplating painting the birds with a coat of clear Wink of Stella…hmmm. (I noticed later that my phone is showing in the mirror card at the bottom…sorry about that. I’m still learning to photograph the cards!)
The ninth card was relatively easy…I just had to use the rest of that beautiful pearlescent floral paper! The piece I had left wasn’t quite wide enough, so I cut thin strips from the sparkly striped paper and edged both sides with that. I had an oval of the silver mirri paper left from one of the other cards, so I centered that and glued it down. At first, I stamped my sentiment in the center with the purple pigment ink and then heat embossed it with the Nuvo Purple Haze embossing powder (that I bought from Lizi’s shop!), but I didn’t like how it turned out…so I cut a circle a little smaller than the last die cut tag from the kit – the one with the smaller pattern of the floral paper – stamped my sentiment in the center then centered it in the scalloped tag. I popped it up with a few foam dots and tied a little pink bow to cover up the small hole from the tag. I then added a few medium sized light purple and dark purple enamel dots and it was done!
The tenth card took a little working on…I wanted to use the rest of the sparkly striped paper, but I also HAD to make a shaker card! I didn’t want to cut an oval out of the paper, but I had an oval in white cardstock that I used instead. I stamped the sentiment in the purple pigment ink, then placed the oval inside a plastic pocket. I sprinkled the sequins from the kit inside then fuzed the oval inside the pocket (I put a little glue tape on the back to hold it straight in the pocket). Then using a bead spoon, I spooned in the sequins and centered in the oval. With my fuze tool, I then circled the oval on the outside- twice. I cut it as close as I dared, but still had to go over a tiny spot that didn’t seal the first time. After trimming the oval, I stretched the branch pinstripe one way around. Then I did it again the opposite direction…this gave it a kind of branch frame that turned out nice. I glued the oval down well, but still felt it needed a little more securing…so I added some more dark purple and light purple enamel dots to anchor it a bit. Plain and simple, but pretty!
Well, that’s it for my 10 Cards – 1 Kit from the Love from Lizi February Monthly Kit. The blog hop is only a few days away so make sure you stop back in on the 1st of March to check out what I made special from this kit, then hop on over to everyone else on the blog hop to see what beautiful creations they came up with. Don’t forget to post a comment on each blog – mine included – so that you are entered to win either one of the sold-out March kits or £20 (around $24.00 for those of us in the states…as of 9:30p EST on February 25th) to use in Lizi’s store!
Ta-ta for now, fellow crafters! See you on the flip side!
I was going through my list of websites that I like to check out periodically and decided that I’ll post what each website is offering for new releases, sales, and upcoming releases. I thought that might get you out there checking out the competition, finding new inspiration, and of course, finding new things to buy! We can never have too much stamps, inks, dies, paper, embellishments,…well, whatever! So…without further ado..
Altenew Has their February Inspiration Challenge and its a beautiful picture that can give wonderful ideas and inspiration. The challenge ends 2/28. They also have a new class “In the Mood for Color” by Stephanie Klauck from 2/12 to 2/26.
Amy Tangerine She has her new book posted and offers a free handbook for the five practices Amy uses to generate creative breakthroughs!
Butterfly Reflections Ink offers a daily “deal of the day” that changes every day. Today they also have a 10% off Hashtag Stamps.
Concord and 9th had their new releases on 2/8, but there are a lot of items from before on there as well to check out. I really want to get that “Hugs Bundle” next payday. I saw Jennifer McGuire use it in one of her videos and it was adorable!
Ellen Hutson has a pin-sights challenge going on, a sale 2/13-2/19 for 20% off all in-stock stamps and a new release coming out the 21st of February! I’m not big on buttons (unless it was when I was making my daughters’ clothes and I just HAD to have those cutsie ones!) but the 28 Lilac Lane – Coral Reef buttons are sooo summery and beachy! Hmm…..
Gina K Designs has some new stuff that are simply beautiful…I want the “Fabulous Flowers” stamp set! If you order over $75.00, you get a beautiful Vintage Rose stamp set and free shipping on orders over $50.00 (in U.S.A.).
Hallmark Scrapbook has a section for 30-60% off dies, stamps, ink, and other supplies…there is a lot of stuff here! They also have a page for new releases that they carry from other companies.
Hero Arts This is one of the first companies I bought stamps from…they carried them in Michael’s. They have some beautiful new stamps and dies out in their recent release that are to “die” for! I already have a wish list started and plan to place a small…order this weekend! They also just started offering subscriptions on their My Monthly Hero kits! I’m a kit addict so of course I signed up! LOL
Honey Bee Stamps It’s release week over there and they have some really cool stuff! I HAVE to get the Curious Kitties stamps and dies! I just HAVE to! LOL I love their dew drops and droplets…another thing I have to have! I have some of their stamp sets and they are really good!
Ink Blot Shop, LLC I haven’t bought anything from them…yet…but I love their little bits of this and that…tiny things that you can scatter over a card background or add little bits to a card to make it cute. Let me know if you get anything and tell me what! I’m keeping an eye on these guys! LOL
Lawn Fawn I have a lot of things from Lawn Fawn and I love their stamps. They are so cute! They have a few things on their sale page, but check back regularly to see if it gets updated…I’m “eyeing” the Clear to See stamps and cuts! Their new releases come out on 2/23 and they have lots of yummy stuff.
Lil’inker designs They have a sale page and….their new release is on 2/20! I’m already making my wish list!
Lindy’s Gang I haven’t bought anything from these guys yet, but not for lack of looking…I can’t make up my mind what I want first! I want to try pretty much everything! LOL They also have a February Color Challenge…scrumptious colors!
Little Things from Lucy’s Cards The embellishments here are so sweet! I have bought a few and want to buy so much more! (Ok, visiting the website and ended up buysing about 7 packages!) They are just what you need for that shaker card or to spread over the face of the card!
Love from Lizi This is one of my MOST favorite websites and the owner is awesome! She’s a new entrepreneur and has just started subscriptions on her beautiful monthly kits! If you order a subscription, she’ll add anything you want to buy into the box so you don’t have to pay extra shipping. Check out her website and Facebook page. There are a lot of great people there! I love ’em!
Mama Elephant Their stuff is just so darn adorable! I love so much of their stamps and dies…always getting something of theirs! They had a release recently so there are new stuff to check out.
My Favorite Things I am ALWAYS ordering something from these guys! I love their stuff and they have awesome releases! Their inspiration and creative team is pretty awesome themselves! I just got a few stamps and dies from them recently and I can’t wait to use them!
My Creative Scrapbook Pam is awesome to work with and I love her Limited Edition Scrapbooking kits. I saw her stuff on Maremi Smallart on YouTube and loved the cards that Marta created! I tracked down the website for the kits…and that was it…I was a goner! Pam packs a lot of cool stuff in her kits so check her out!
Neat & Tangled I have only a little of their stuff, but what I have I love! They also have a sale page so you can always pick up something inexpensive from them. Their stuff is so cute!
Penny Black I have a few of their stuff and I love it…I plan to get more of their hedgehog stamps, especially! There is a lot of stuff on this site so head over and check them out! They also had a new release recently so I need to head over there myself!
Pretty Pink Posh I love Paulina’s stuff! I have a list of stuff on my worktable that I want to order from her, but keep changing it because she has so many beautiful sequin colors and I have a limited amount to spend! LOL
Reverse Confetti I love their stuff over here…I love everyone’s I know, but their stuff is really good. I love the “Cured” stamps and die set! Those adorable little piggies! LOL
Simon Says Stamp! I am always on this website…creating an order…a wish list…checking out the new releases they are carrying…Since they carry a lot of different brands, I tend to get some of the smaller companies’ stock from them but I do like to hit those other websites too!
STAMPlorations I just recently signed up for their bi-monthly stamp and die kit. I should be receiving it soon. I’ll let you know all about it! You get a lot in this kit and you actually get to choose what you want! Cool, huh?! They also have a mess of challenges always going on!
Sugar Pea Designs I just found this website recently. I’m going to have to spend a while checking them out! They seem to have a lot of adorable stamps, dies and patterned paper…hmm… They have bi-monthly releases starting on the 3rd Monday of every other month, so I think the next release will be April (They are just finishing up their Winter Release). They have monthly challenges as well.
Sunny Studio This is another one I just found recently. What I can see of their stuff is adorable! I’m eyeing their Daffodil Dreams Die and Stamps…I love daffodils! They also have a turtle shaker card on their blog that I have GOT to try! It’s adorable!
Winnie & Walter I want their Big Hugs Stamp and Die combo! It is SOOO adorable! I am also considering some of their Cutaways and that Happiest of Holidays stamp & die combo!…check them out!
Wplus9 I have my eye on their Curious Forest Friends stamp set… I have their Whimsy Alpha set and I’m am just gonna have to get the die to go with it! They also have a clearance link, as well!
Your Next Stamp This is another site I have bought from…yet…but it’s only been because of lack of money! I love their monster stamps! They would make adorable cards for little “monsters”! They also have a link for specials..retired stamps, deal of the week, retired dies, even gumdrops! They also hold sketch challenges and color challenges!
After all of this, my bank account is going to take a major hit! But it’s worth it! LOL But I have a lot of ideas and goals coming up! So new stamps and dies will work just perfect into those goals!
Well, I’m gonna run now ya’ll. Have a wonderful weekend and enjoy time with family and friends! Happy crafting!
Hi, everyone! I was hoping to make a video of this but my video cam takes photos at a slower speed than I need – even when I speed it up. I can’t get anything over 4x speed or it starts jumping and starting/stopping. It isn’t worth it right now…too much to do and not enough time! LOL
Anyway, I love this month’s kit from Simon Says Stamp! I love coffee, I love tea…and who doesn’t love hot cocoa this time of year? (I’m in Maryland and its cold right now!) Anyway… I got off to a slow start with this kit at first…the creative juices just weren’t flowing, but once I got going..! LOL!
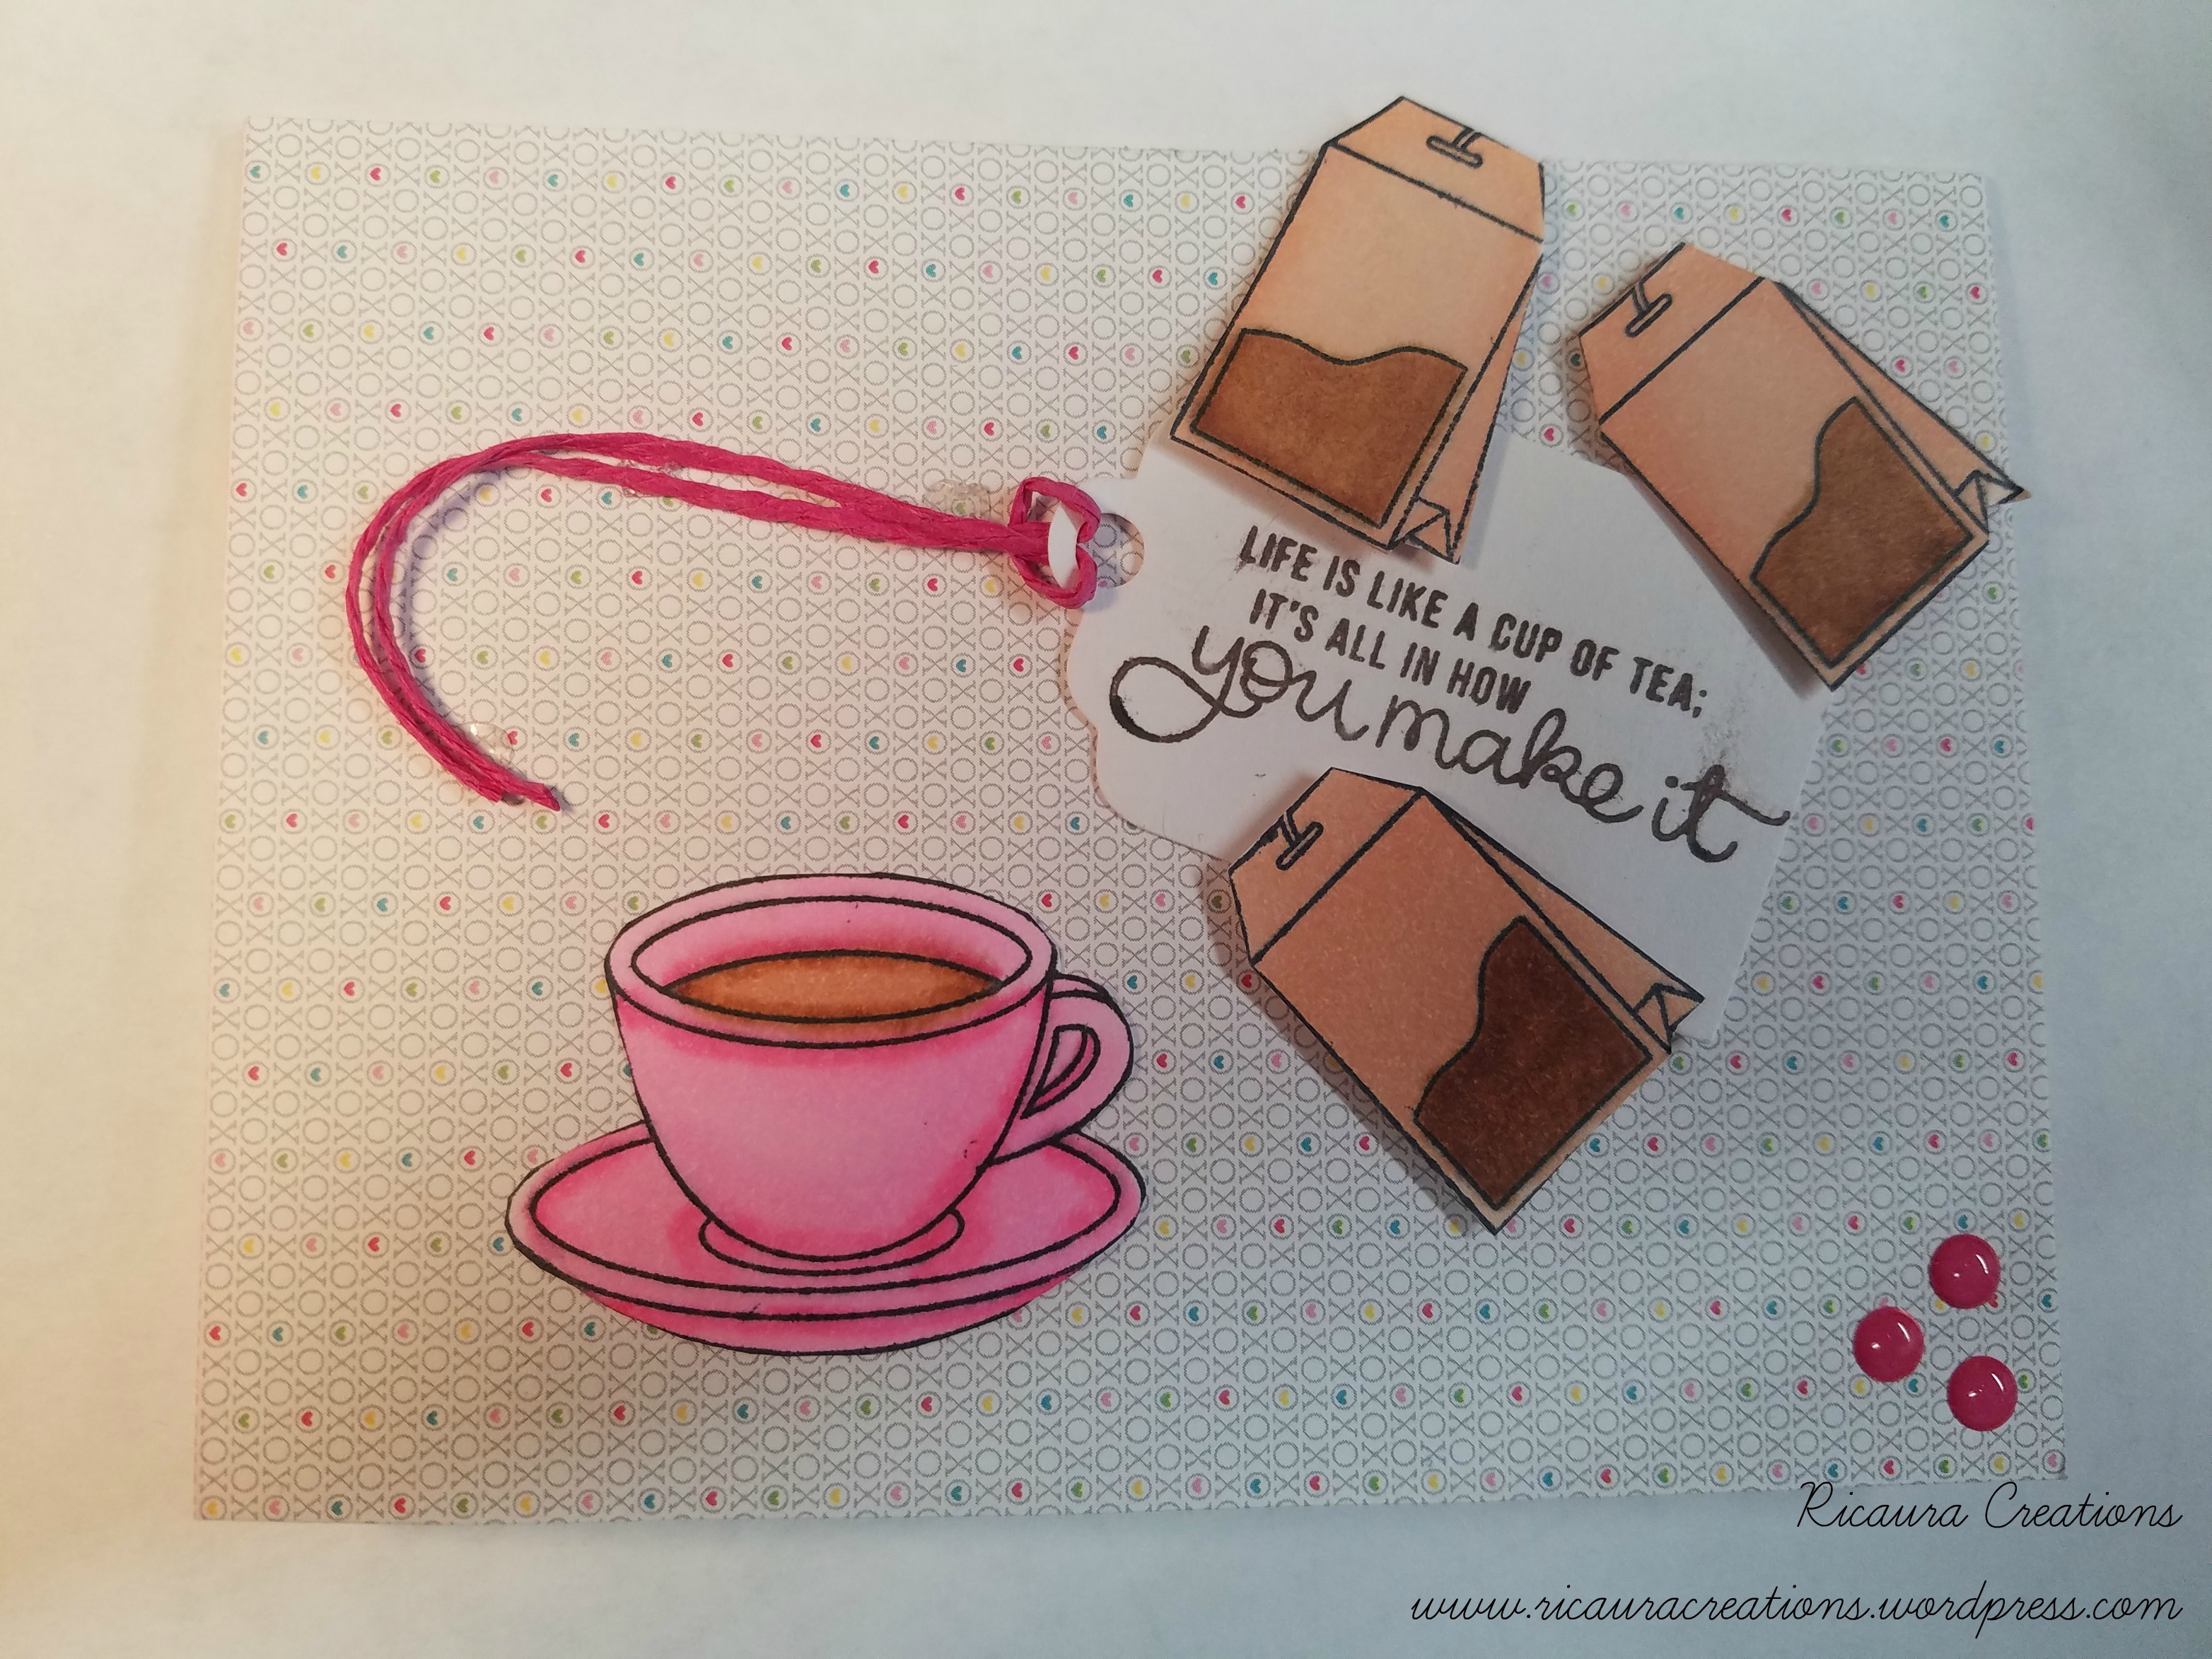
For my first card, I used a top folding card in #120 white from the kit. The background paper is the little tiny XOXO print with colorful hearts scattered around from the Doodlebug paper pad. I printed a tea-cup and three tea bags using Memento Tuxedo Black on white card scraps, then fussy cut them out. The tea cup was colored with Copic Markers RV02 and RV04, while the tea bags were Copic Markers E11 and E37. I stamped a small tag with the sentiment with MementoLuxe in Rich Cocoa (felt it suited this kit perfectly!). A little fuchsia cord and a few of the darker pink enameled dots and its done!
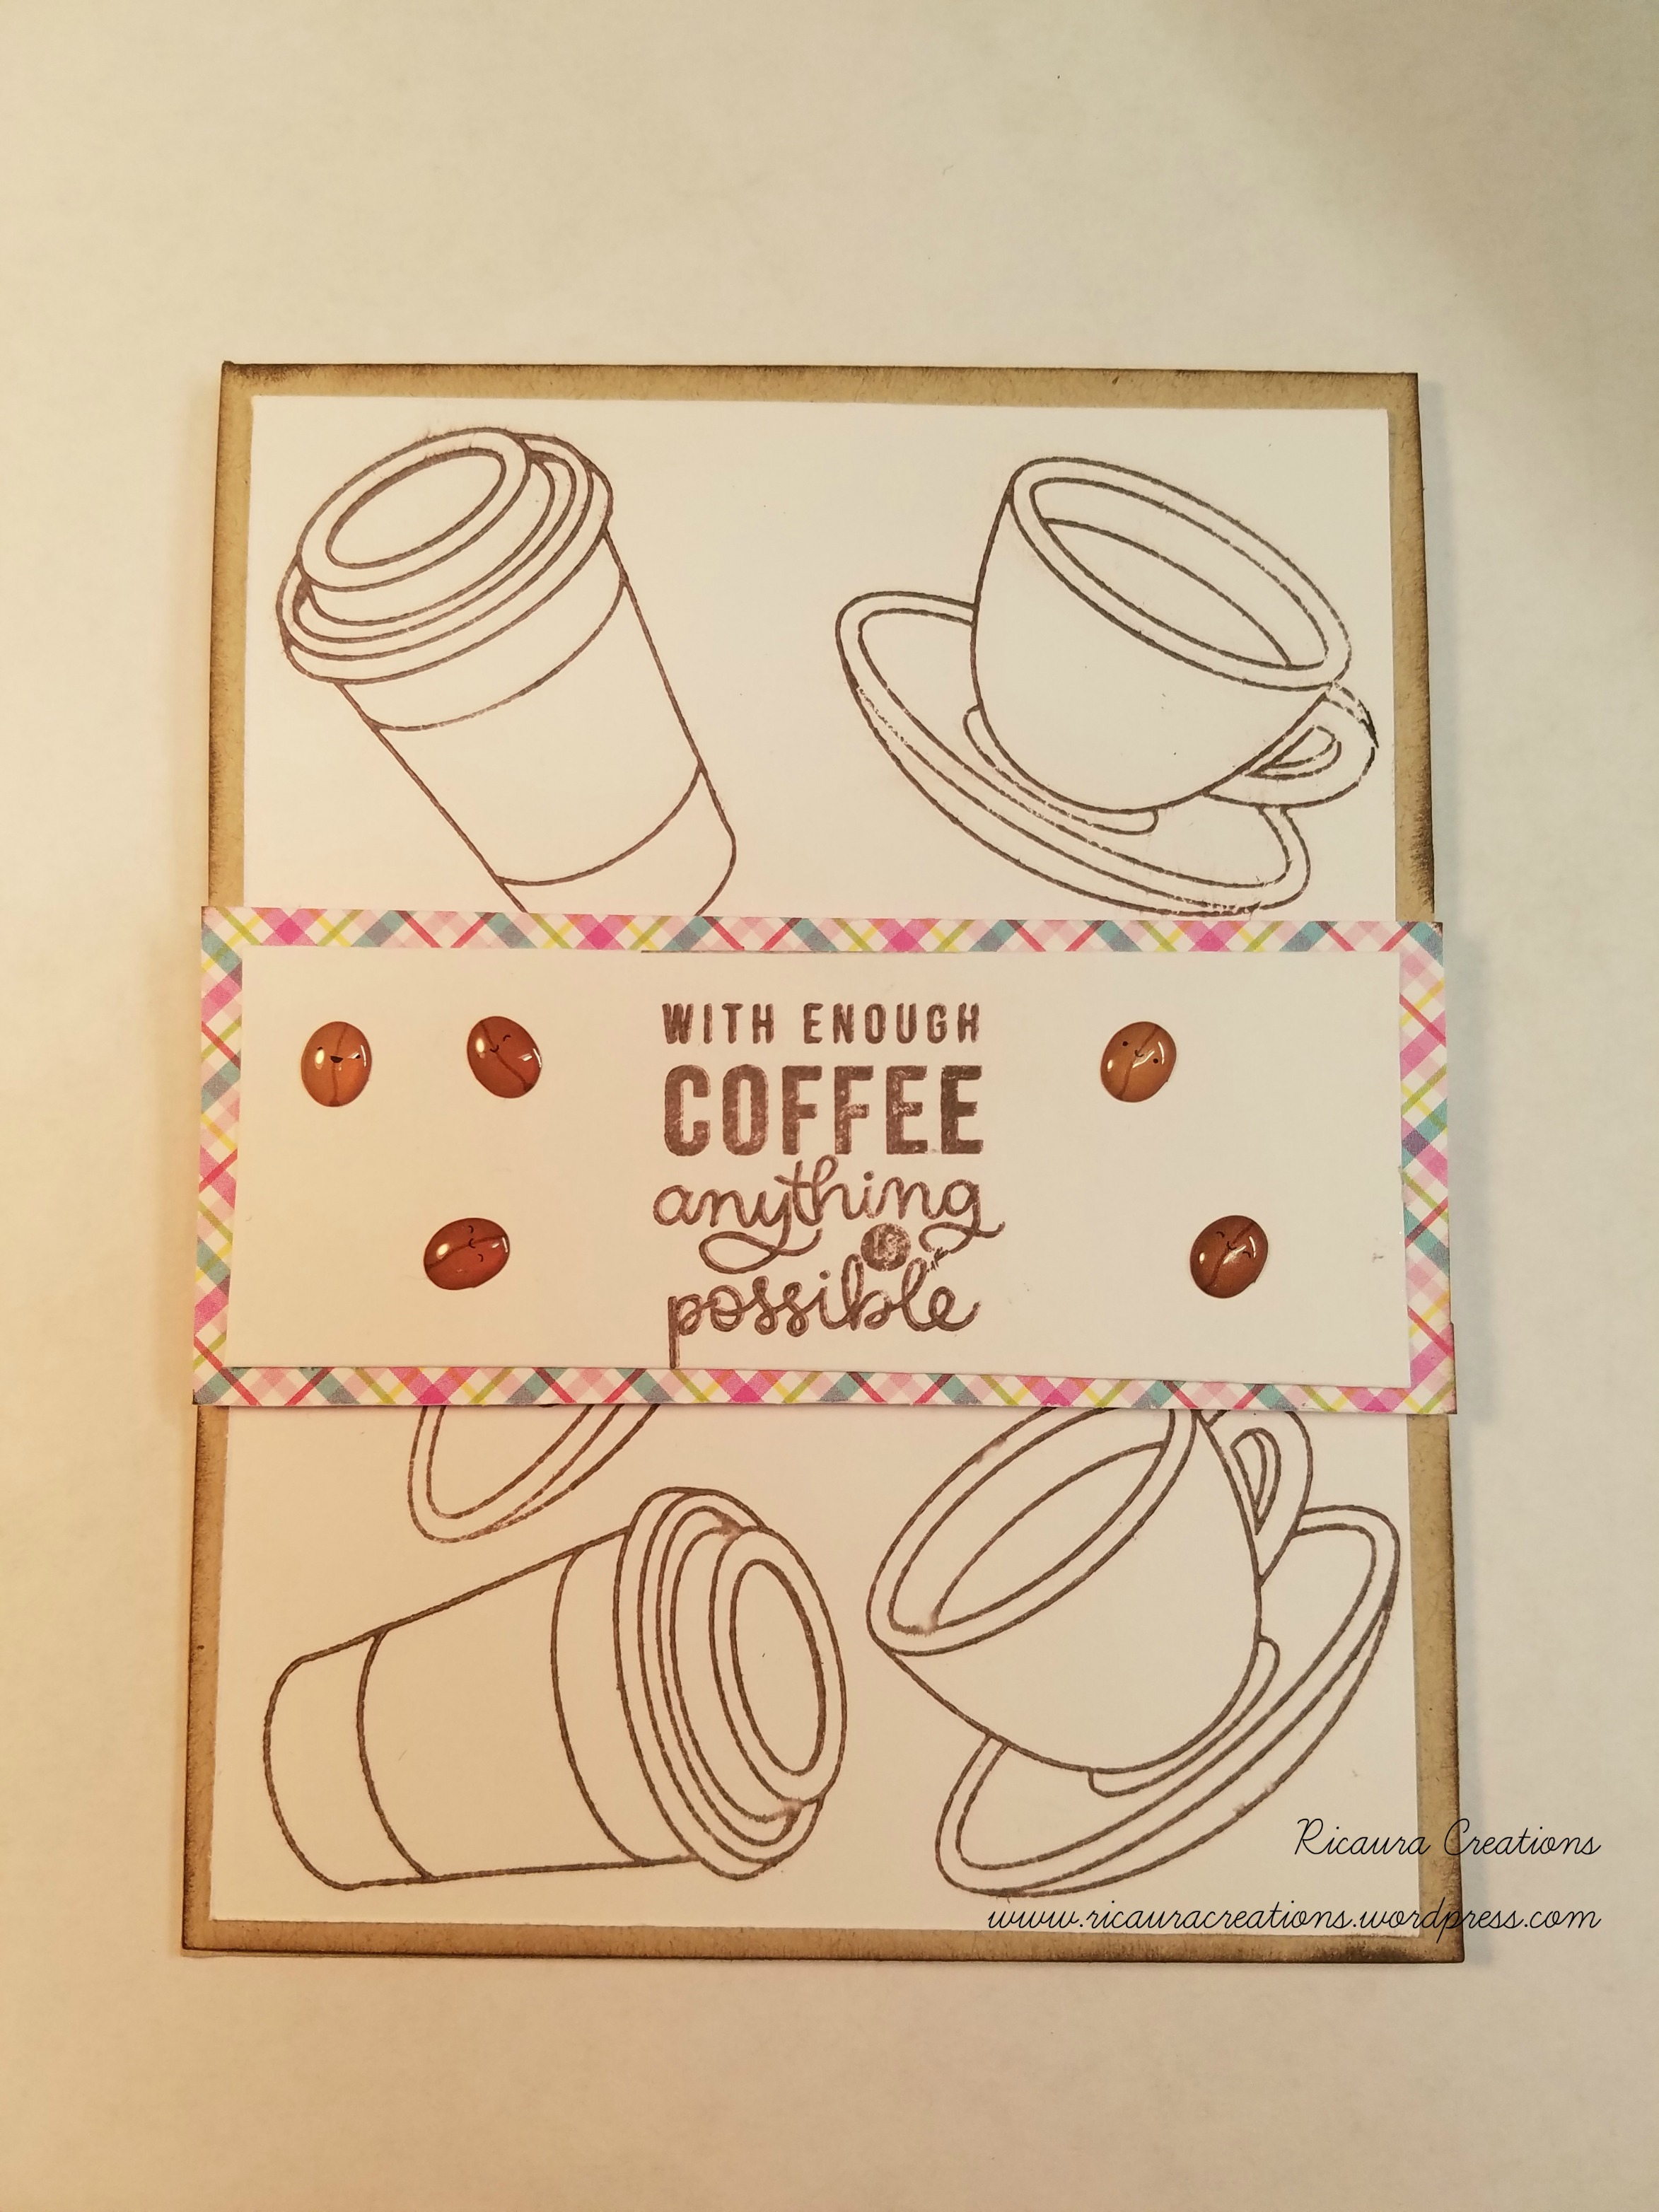
The second card I used the Neenah Desert Storm cardstock top fold vertical. A simple white background in Sweet Tooth (MFT) was stamps repeatedly in the Rich Cocoa using the coffee cup and tea-cup stamps. I left them uncolored to keep it a little less busy. A rectangle strip from the same MFT cardstock is stamped with another sentiment from the kit, and backed with a strip of the adorable plaid paper in the kit. A few scattered coffee beans and that’s done!
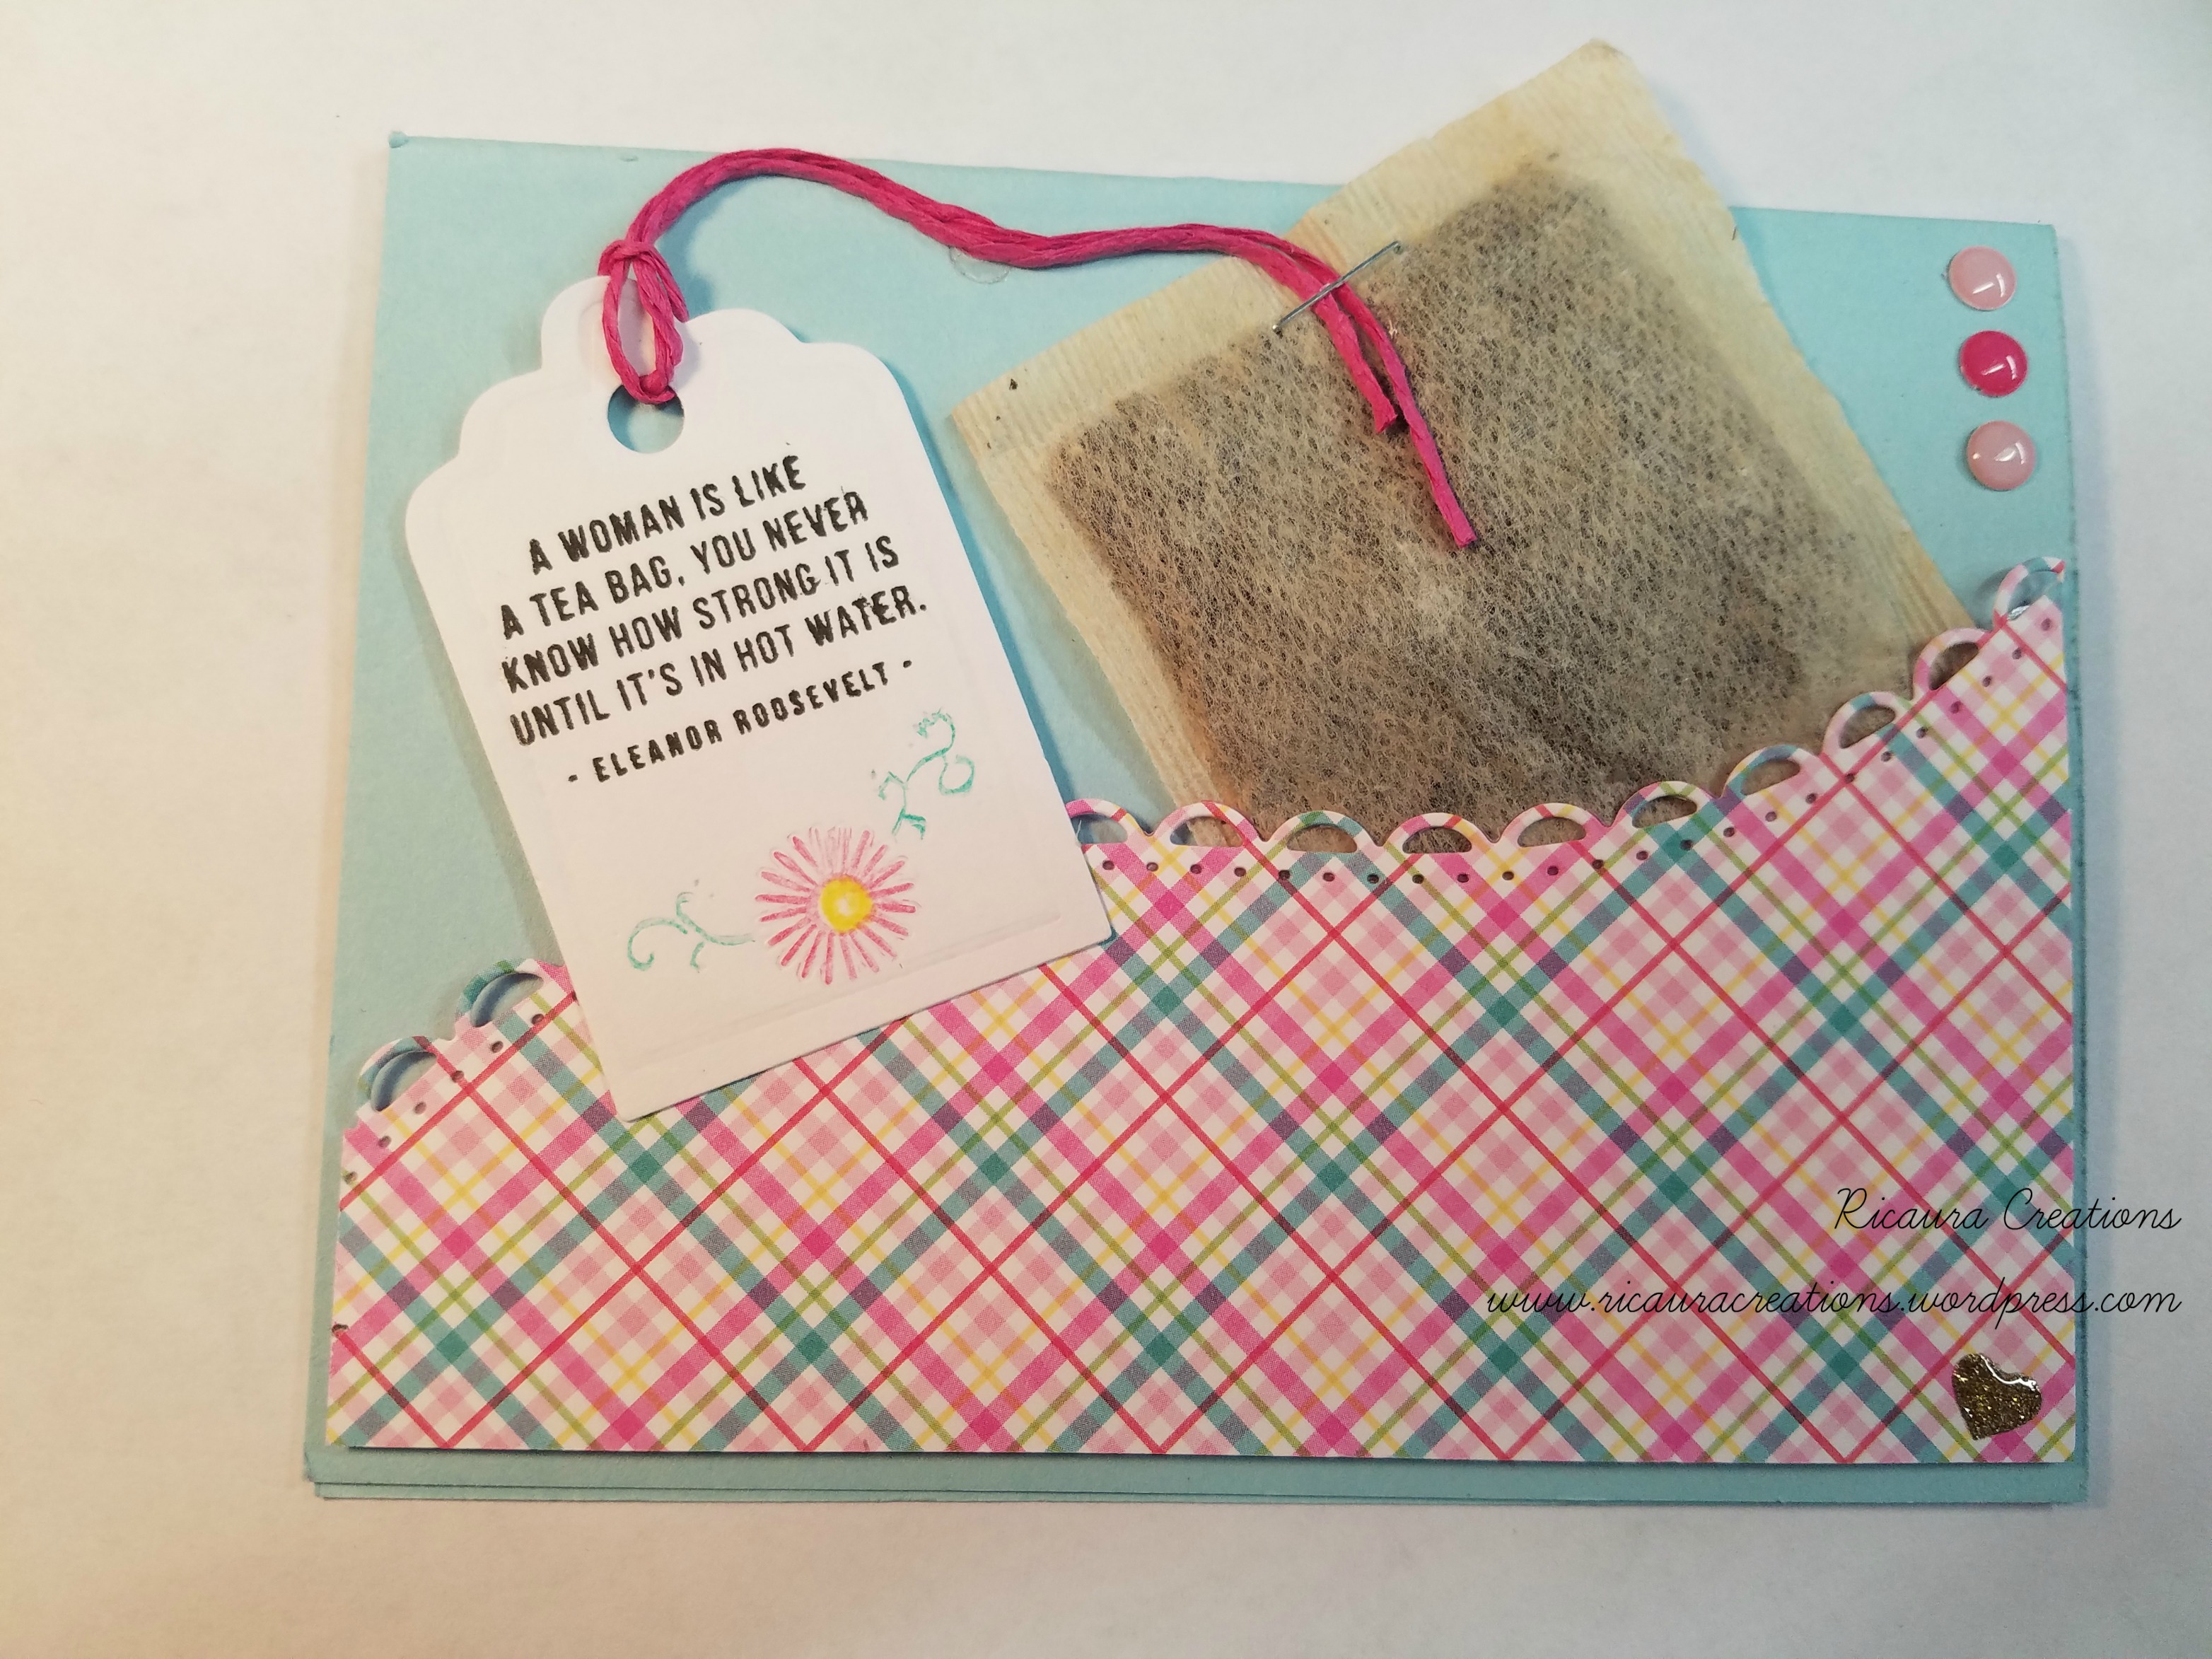
The third card was a little take-off of a card Vicky Papaioannou did on her video…but I don’t drink regular tea so I used an herbal tea bag (which smells divine!). The card was the Surf Blue Cardstock and I used a scalloped border to die cut the plaid paper. A small tag die to cut the tag for the sentiment – this tag die comes with inserts that emboss your tag – I used one to give me a tiny flower that I colored in with pencils to match the plaid paper. A piece of the fuchsia cord for the tag, then a staple to the tea bag, and that was it. I used a few of the enamel dots in light pink and dark pink and one of the glitter hearts to finish this card off.
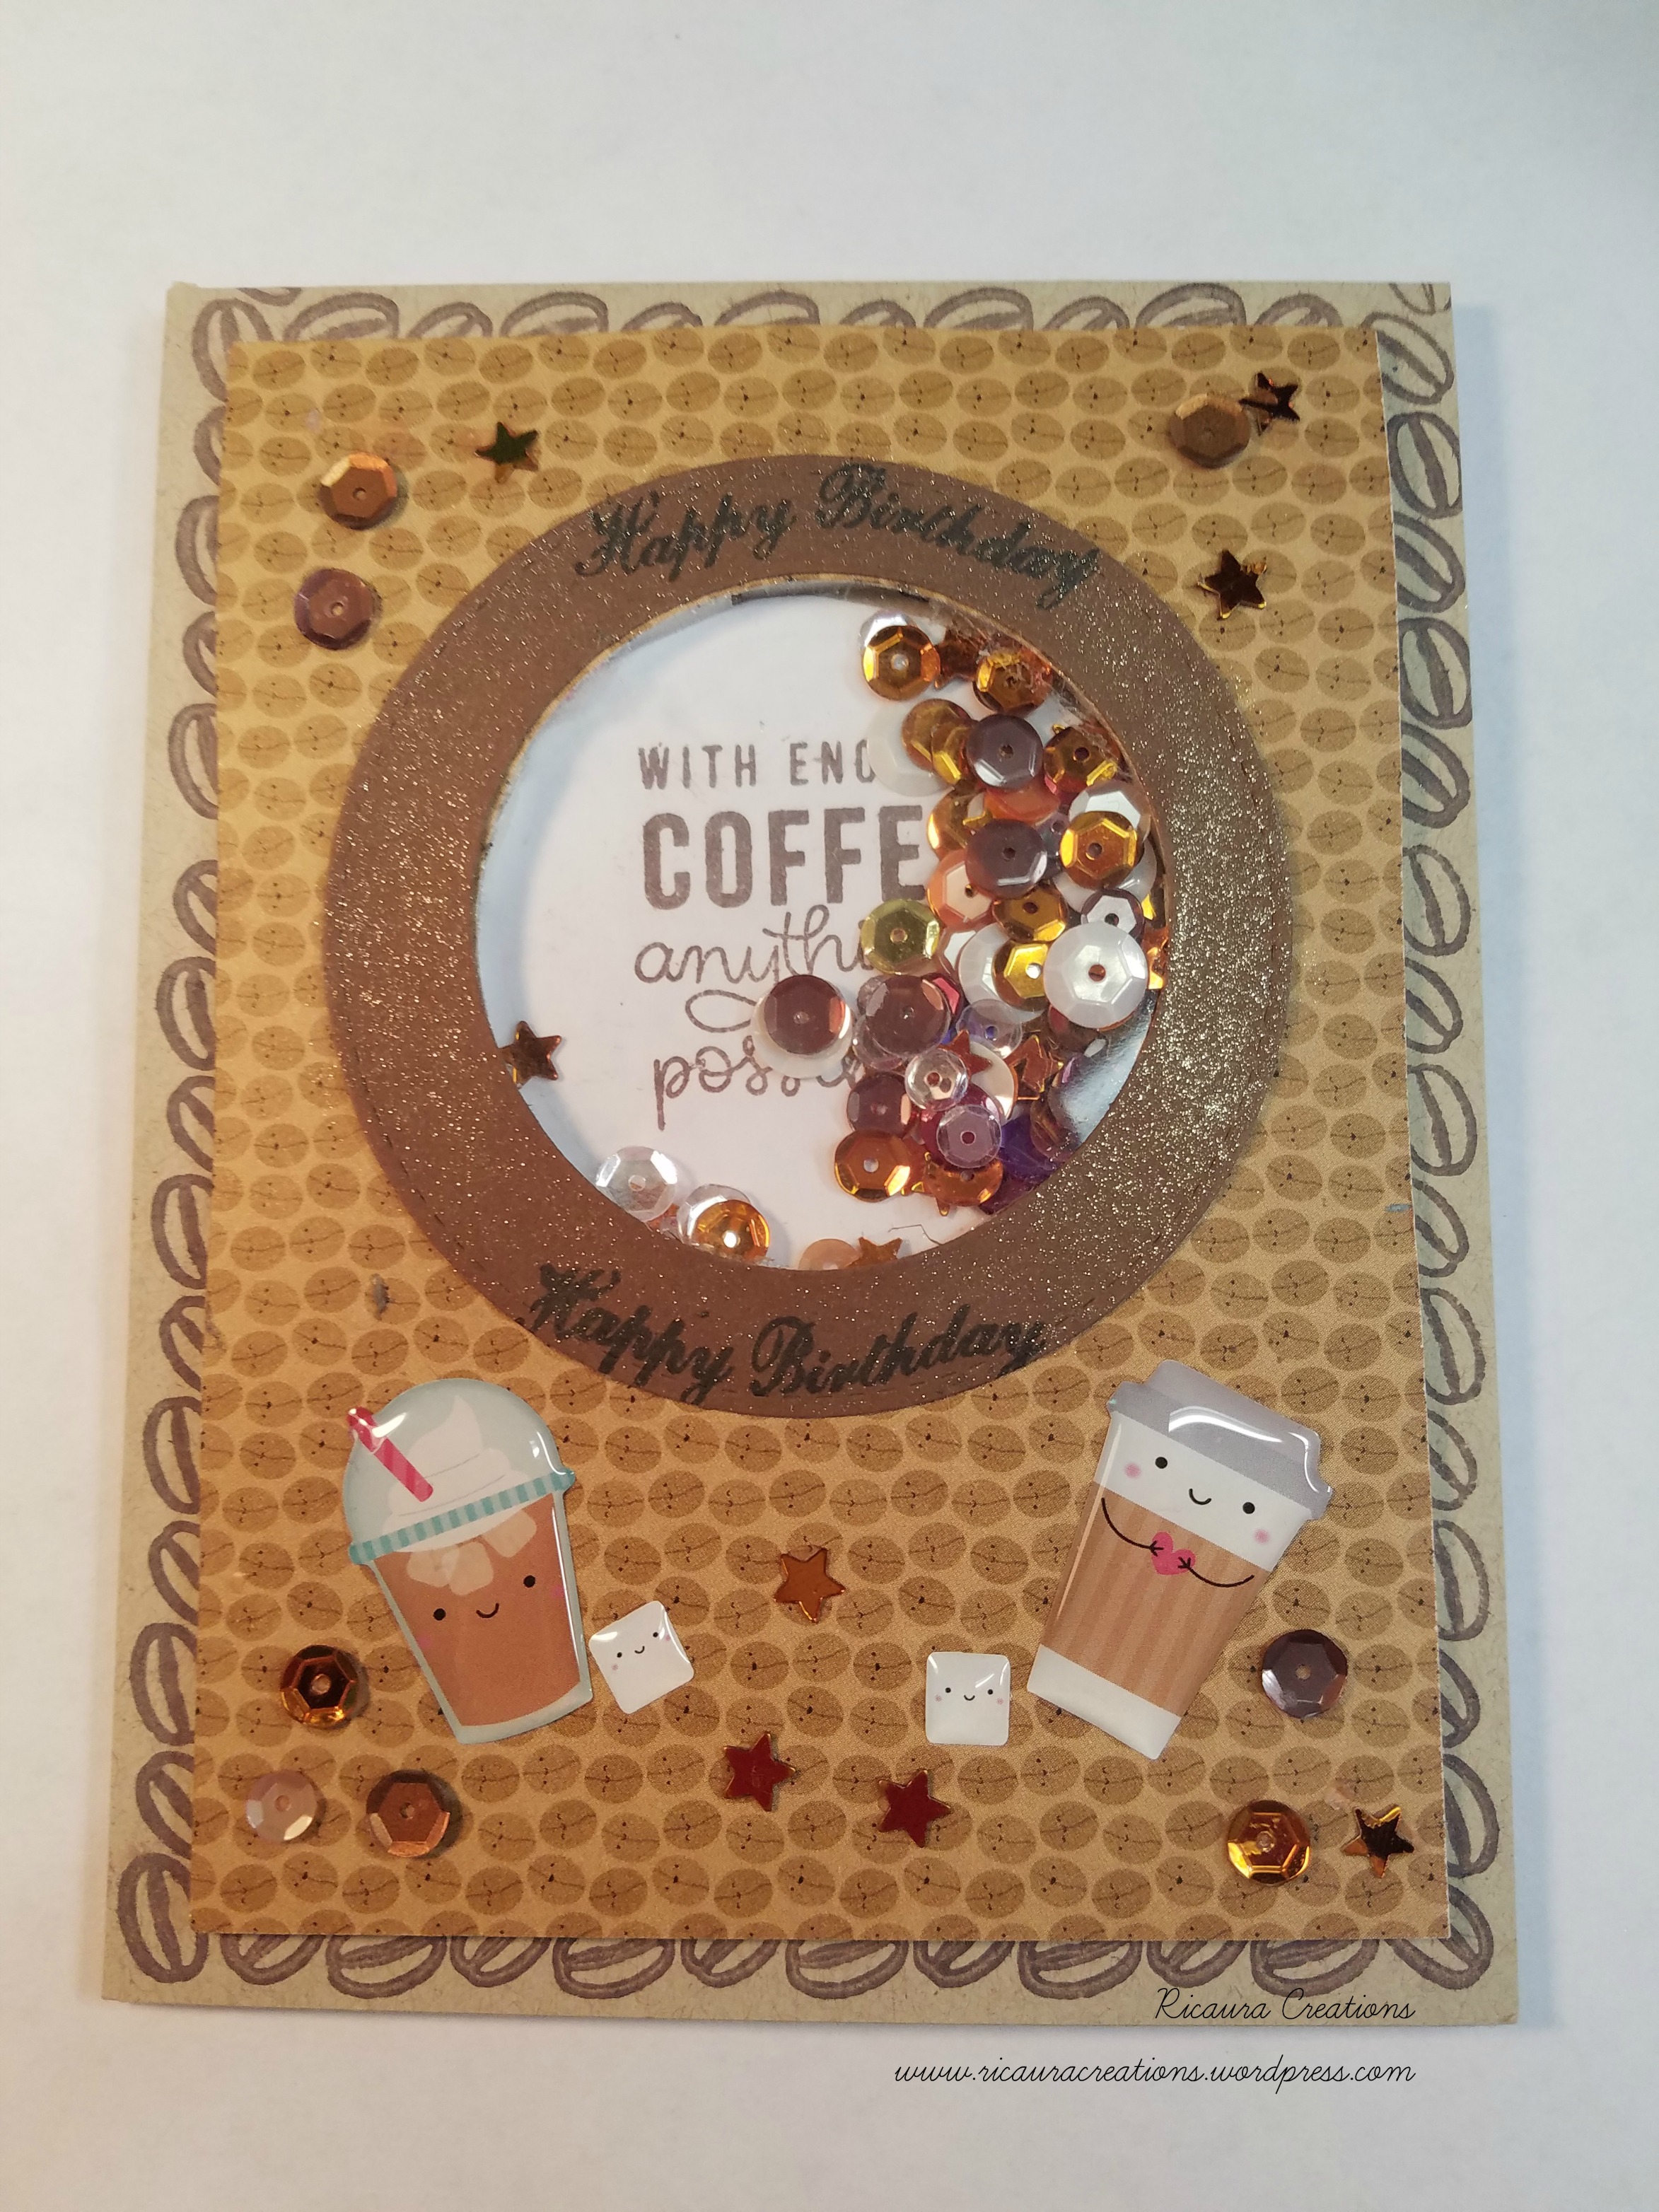
My fourth card had a purpose in mind before I even started it. My youngest daughter, Dani, will be 26 the 1st of March. She’s a coffee addict so I wanted her card to be very, very coffee! LOL Using the Desert Storm Card-stock with a top fold, I stamped coffee beans all around the edges from another stamp set that I had in Rich Cocoa. Using the paper that was covered in coffee beans, I die cut a circle out of the top center and covered it with a piece of acetate. Using a piece of brown cardstock from my stash, I die cut a frame and stamped Happy Birthday in Tuxedo Black at the top and at the bottom. This was then glued over the circle with the acetate…I’m trying to make a shaker card…LOL I die cut a piece of white cardstock in a circle, stamped it with my sentiment, then glued it to the back of the paper covered with tiny coffee beans, then popped it up with foam tape, added some sequins from my stash in various coffee tones and glued the whole thing down on the card base. The two puffy coffee stickers – one for frappechino and one for carry-out coffee, two sugar bag stickers (from the kit), and more sequins finished off this card. I just had to cover the brown frame with some Wink of Stella clear glitter pen because it just needed something else! Inside I made a gift card pocket from brown card stock, glued some birthday balloons and streamers around it, added a metallic “happy birthday” and its all ready for the Starbucks gift card I got her! She’ll probably roll her eyes at me, but she’ll love it secretly!
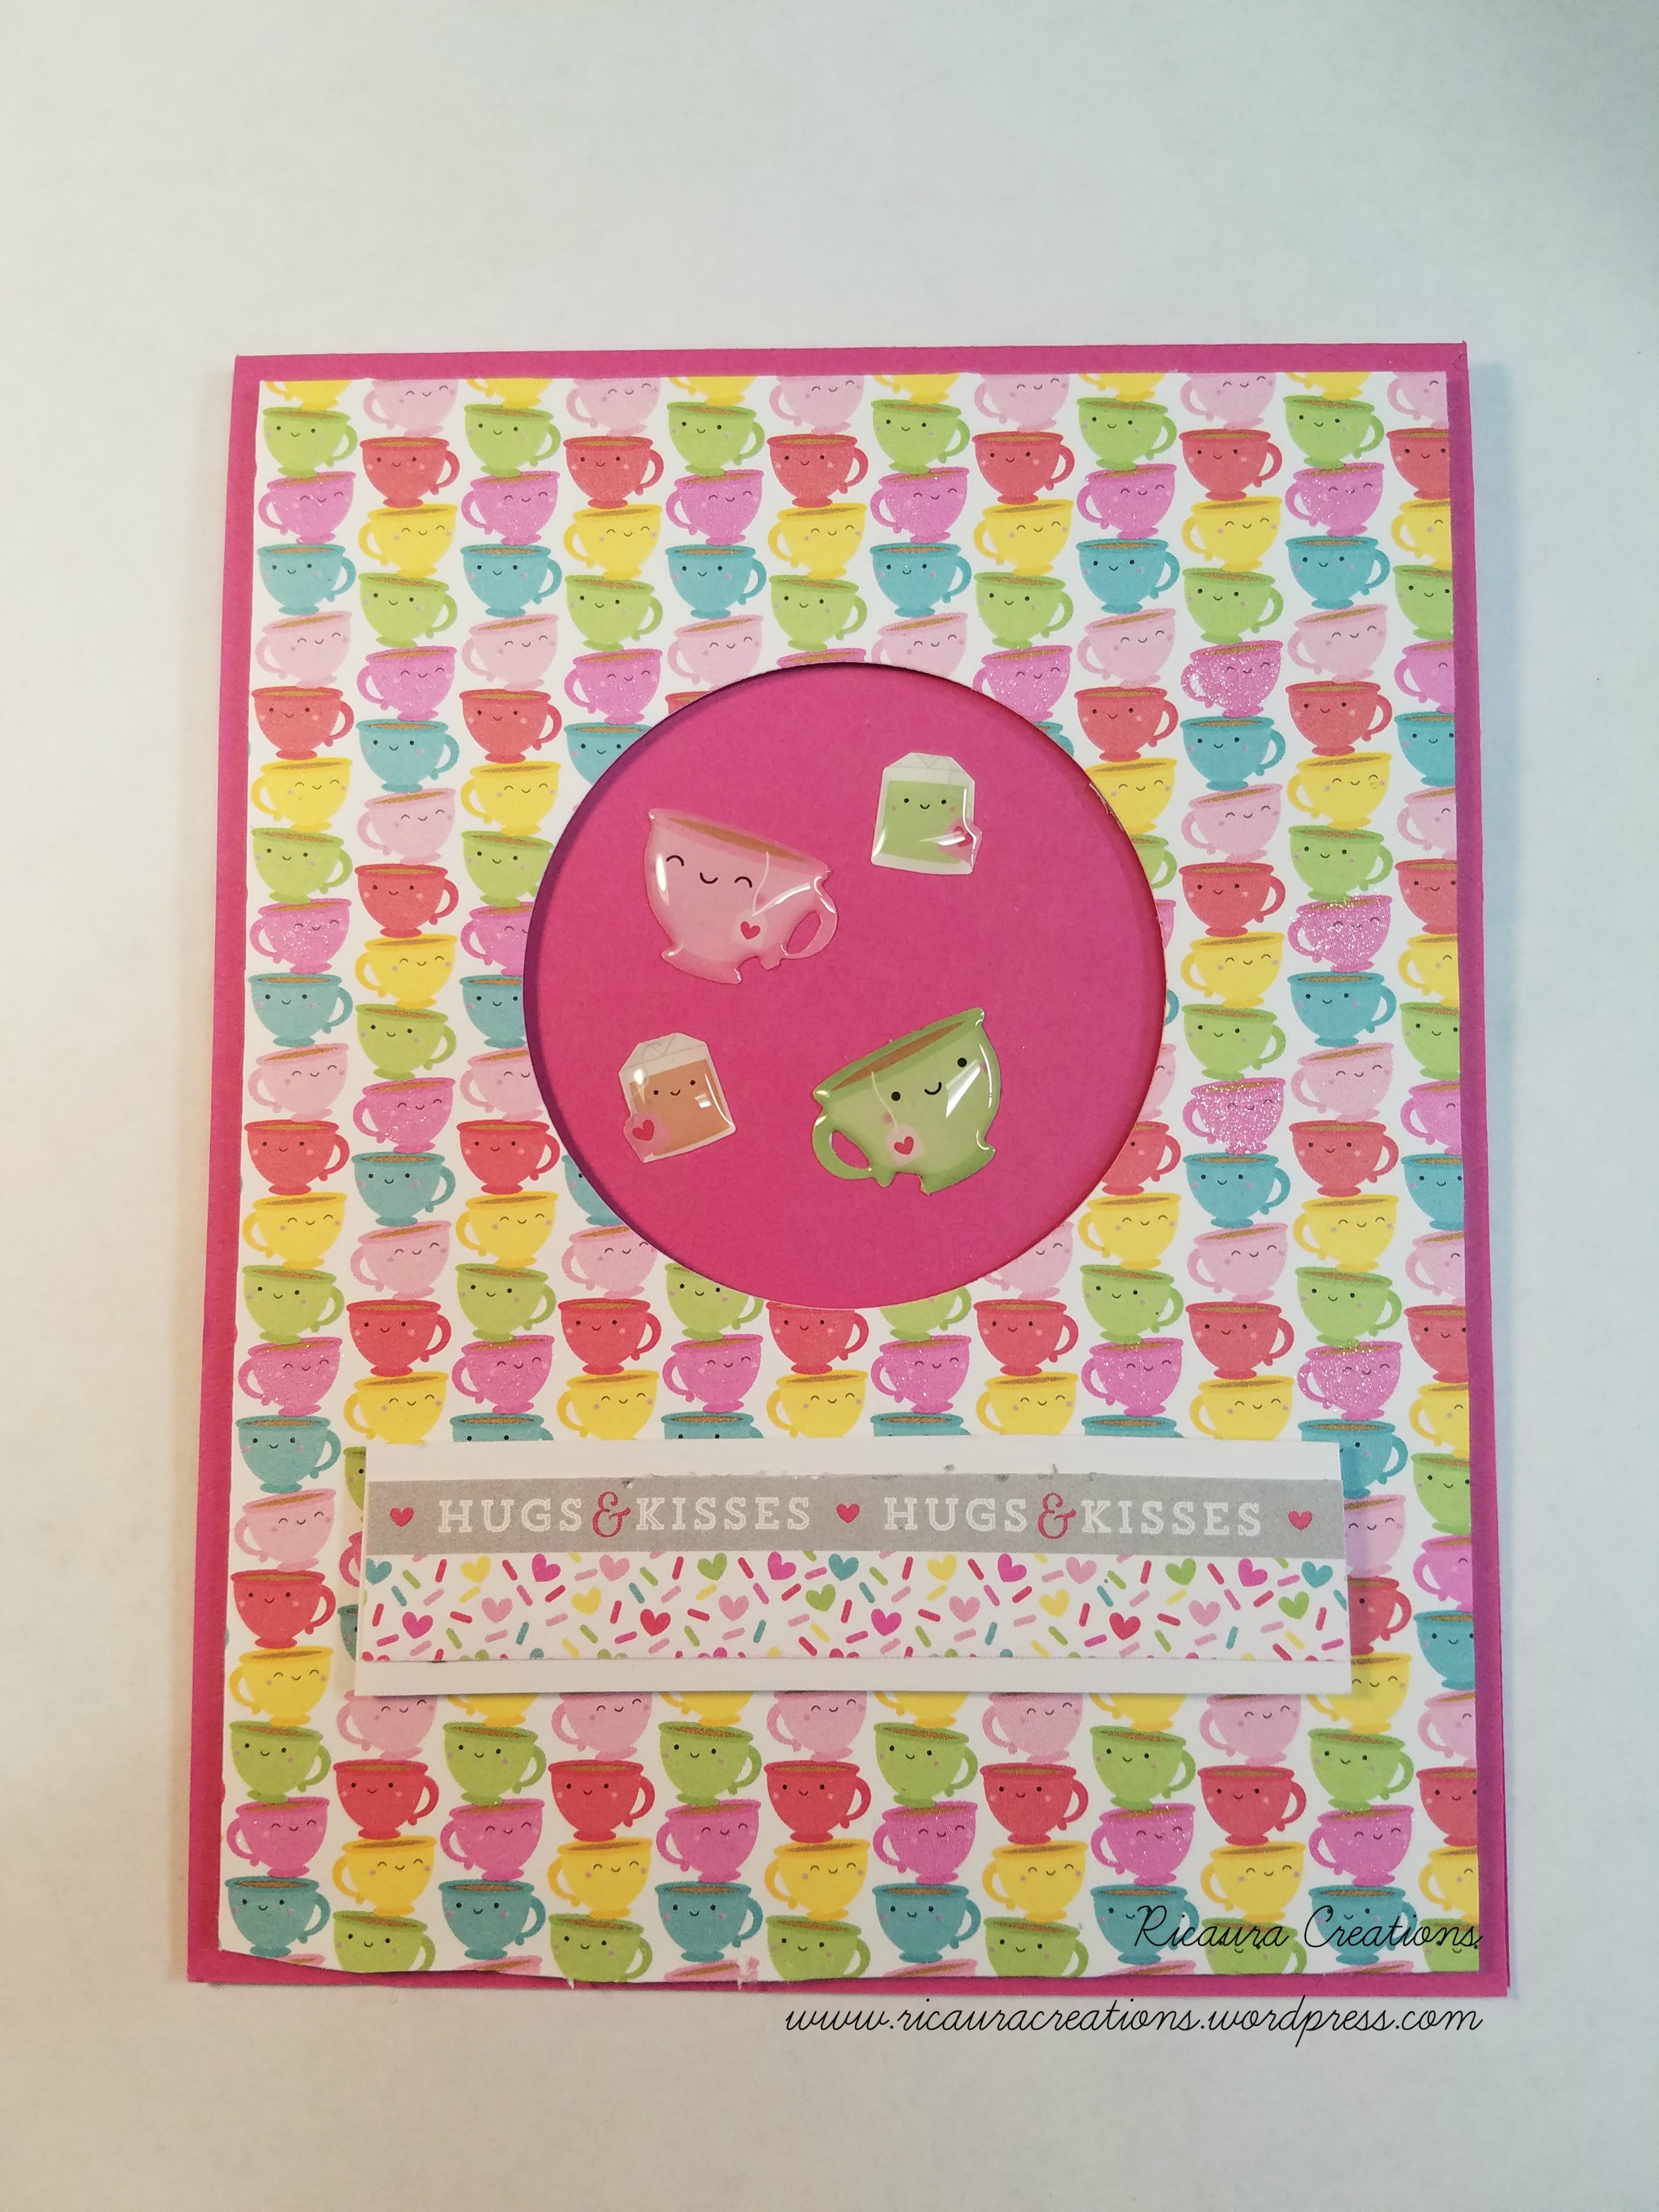
My fifth card was in the Doll Pink cardstock. I chose the paper that was covered with stacked tea cups (which I thought were jelly beans at first!). I cut it a slight smaller than my card base, die cut a circle in the top center, then popped it up with some foam tape. Two of the puffy tea-cup stickers and two puffy tea bag stickers went in the center that I cut out. I used one of the sentiments from the paper pad pack and backed it with a strip of white cardstock. This was popped up with some more foam tape…a pretty simple card.
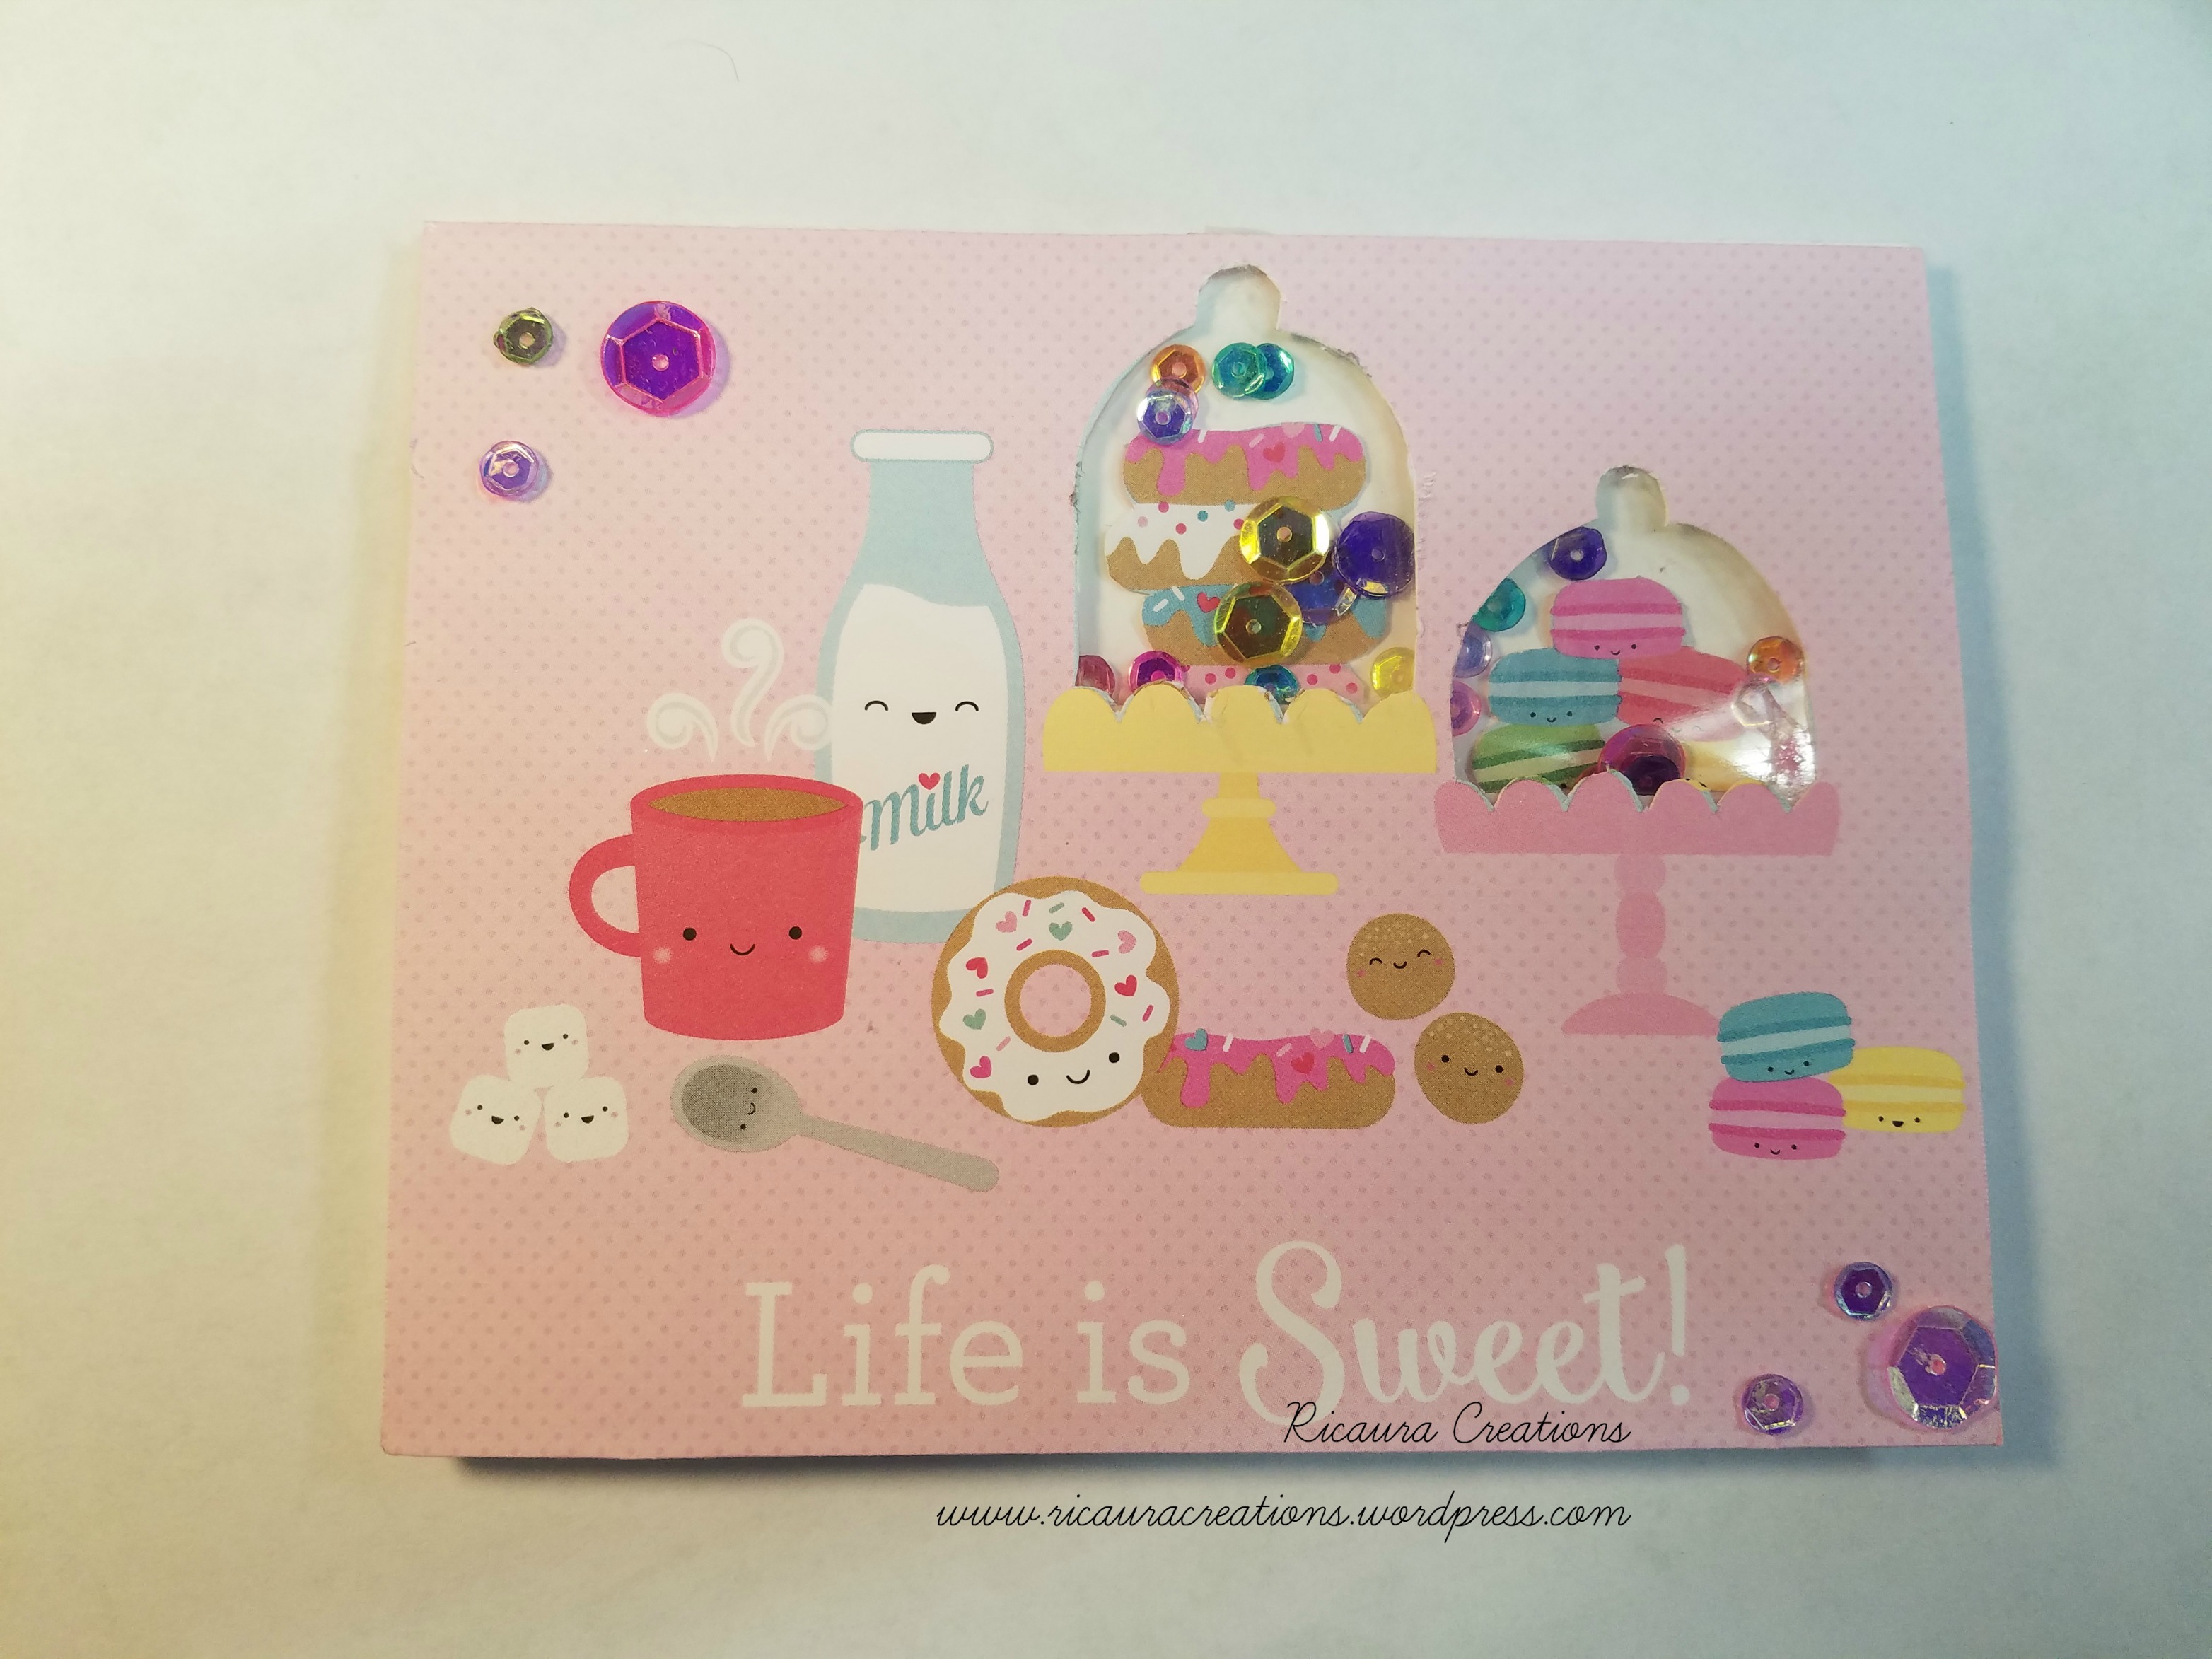
The sixth card is another copy from Vicky…she had some really great ideas! ….Using the piece of paper from the kit that had the “Life is Sweet” pattern and pictures, I cut out the covers to the two dessert dishes. I fussy cut the donuts and macaroons. I backed the cutout portions with acetate and popped this paper up with foam tape. After determining where the “windows” would fall, I glued the donuts and macaroons behind the “glass” ..added some sequins, and glued the whole thing to a white card base. A few more sequins scattered on the card and it was done…as my little boy says “easy, peasy”!
My seventh card used everything from the kit…a white card base top fold, the heart paper from the kit, and the little list tag cut from one of the papers, and another with the tea cups. Two sentiment strips were cut from the paper pad as well. I glued and foam taped them to pop them up and another simple card!
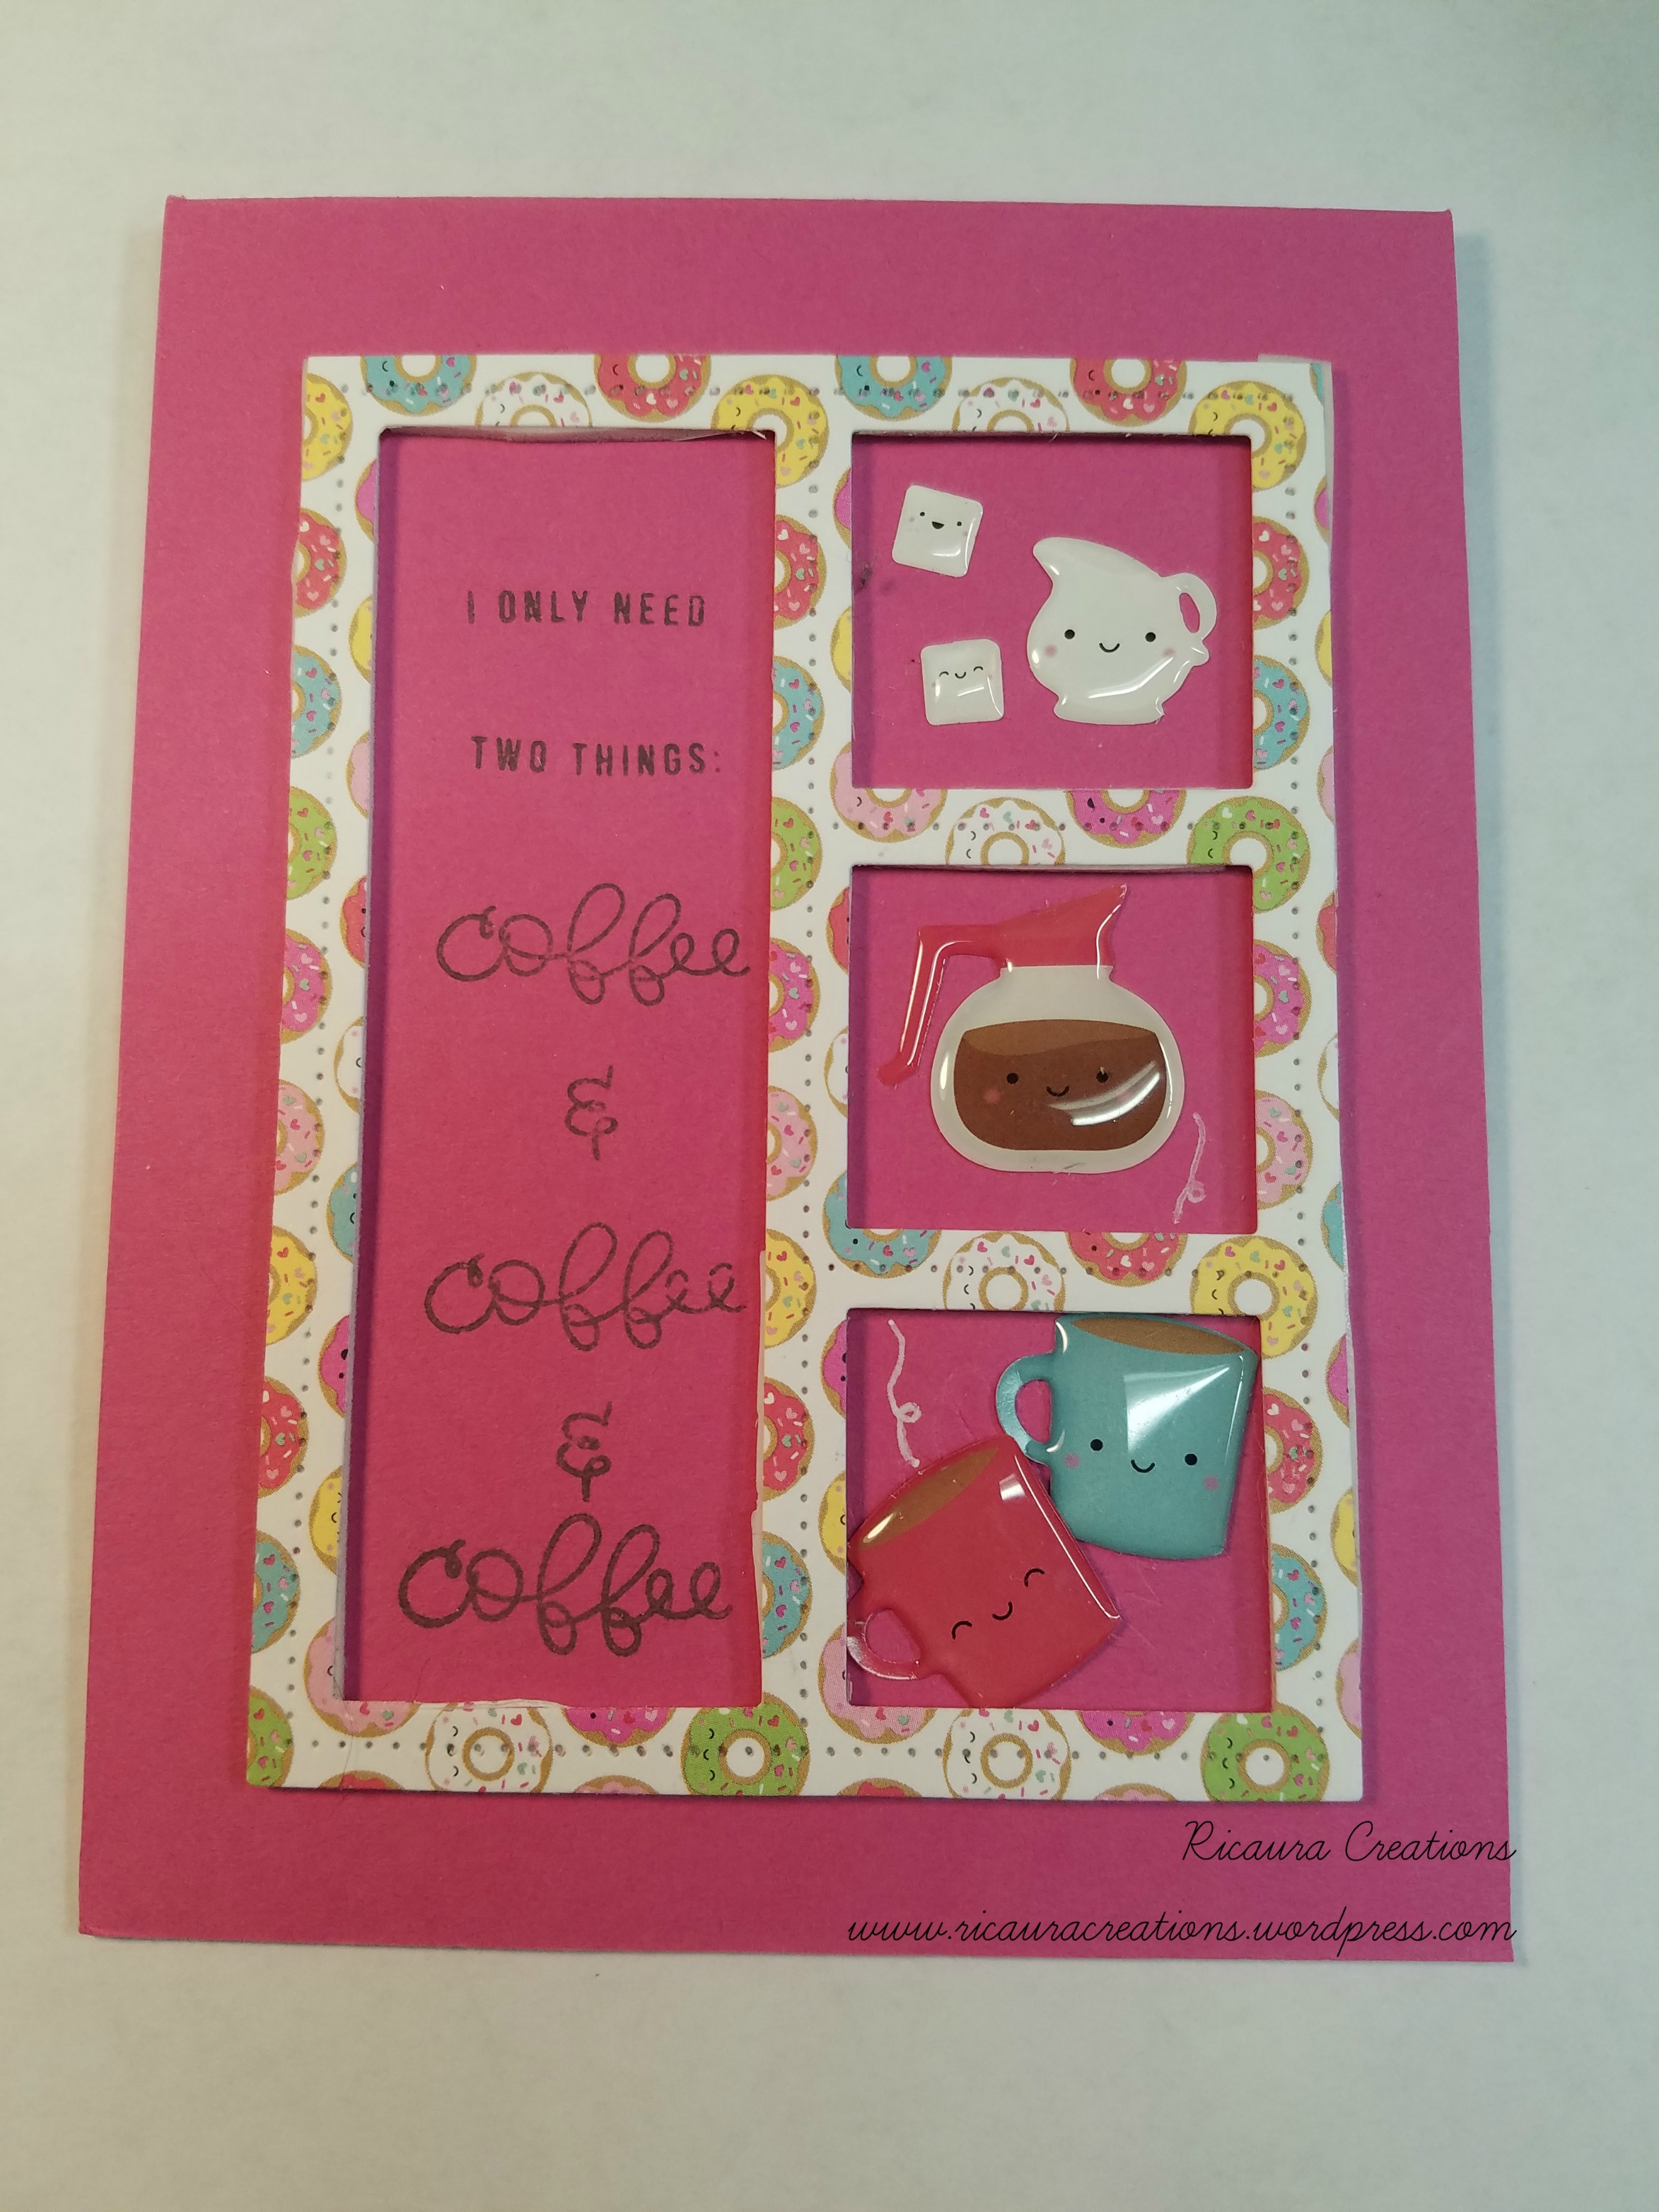
The eighth card is using the Doll Pink cardstock. I cut a panel from the donut paper and popped the frame up with foam tape. I stamped the sentiment in the long window (“I only need two things…coffee & coffee & coffee… I just had to add that extra one!). The creamer and sugar stickers for the top window, the coffee pot for the center window, and two steaming coffee mugs for the third window. This kit made things SOOO easy!
The ninth card went a little sideways from the start so I had some nitpicking to do. I used a piece of the Sweet Tooth cardstock, edged it with Dark Espresso ink and glued it to a white card base. I die cut a frame from the greenish paper in the pad, and glued that down in the center. From the stamp set I got the coffee bean strip from, I stamped and fussy cut a lot of coffee beans (stamped in the Rich Cocoa on brown card stock from my stash) and then glued them onto the frame like “flowers”. I die cut three coffee cups in patterned paper, three in white, and three using kraft card stock from my stash. I fussy cut the lids from the white, and the heat bands from the kraft, then glued them all together. I popped them up with foam tape in the center of the frame. Using a small scrap of the plaid paper, I die cut a square, which I topped with a smaller square in white. Stamped from the stamp kit that had the coffee beans, I used the Rich Cocoa ink again. Glued these two together, popped up with some foam tape, and then scattered some coffee-colored sequins around. Of course, I just had to add a little Wink of Stella clear pen to the heat bands on the coffee cups!
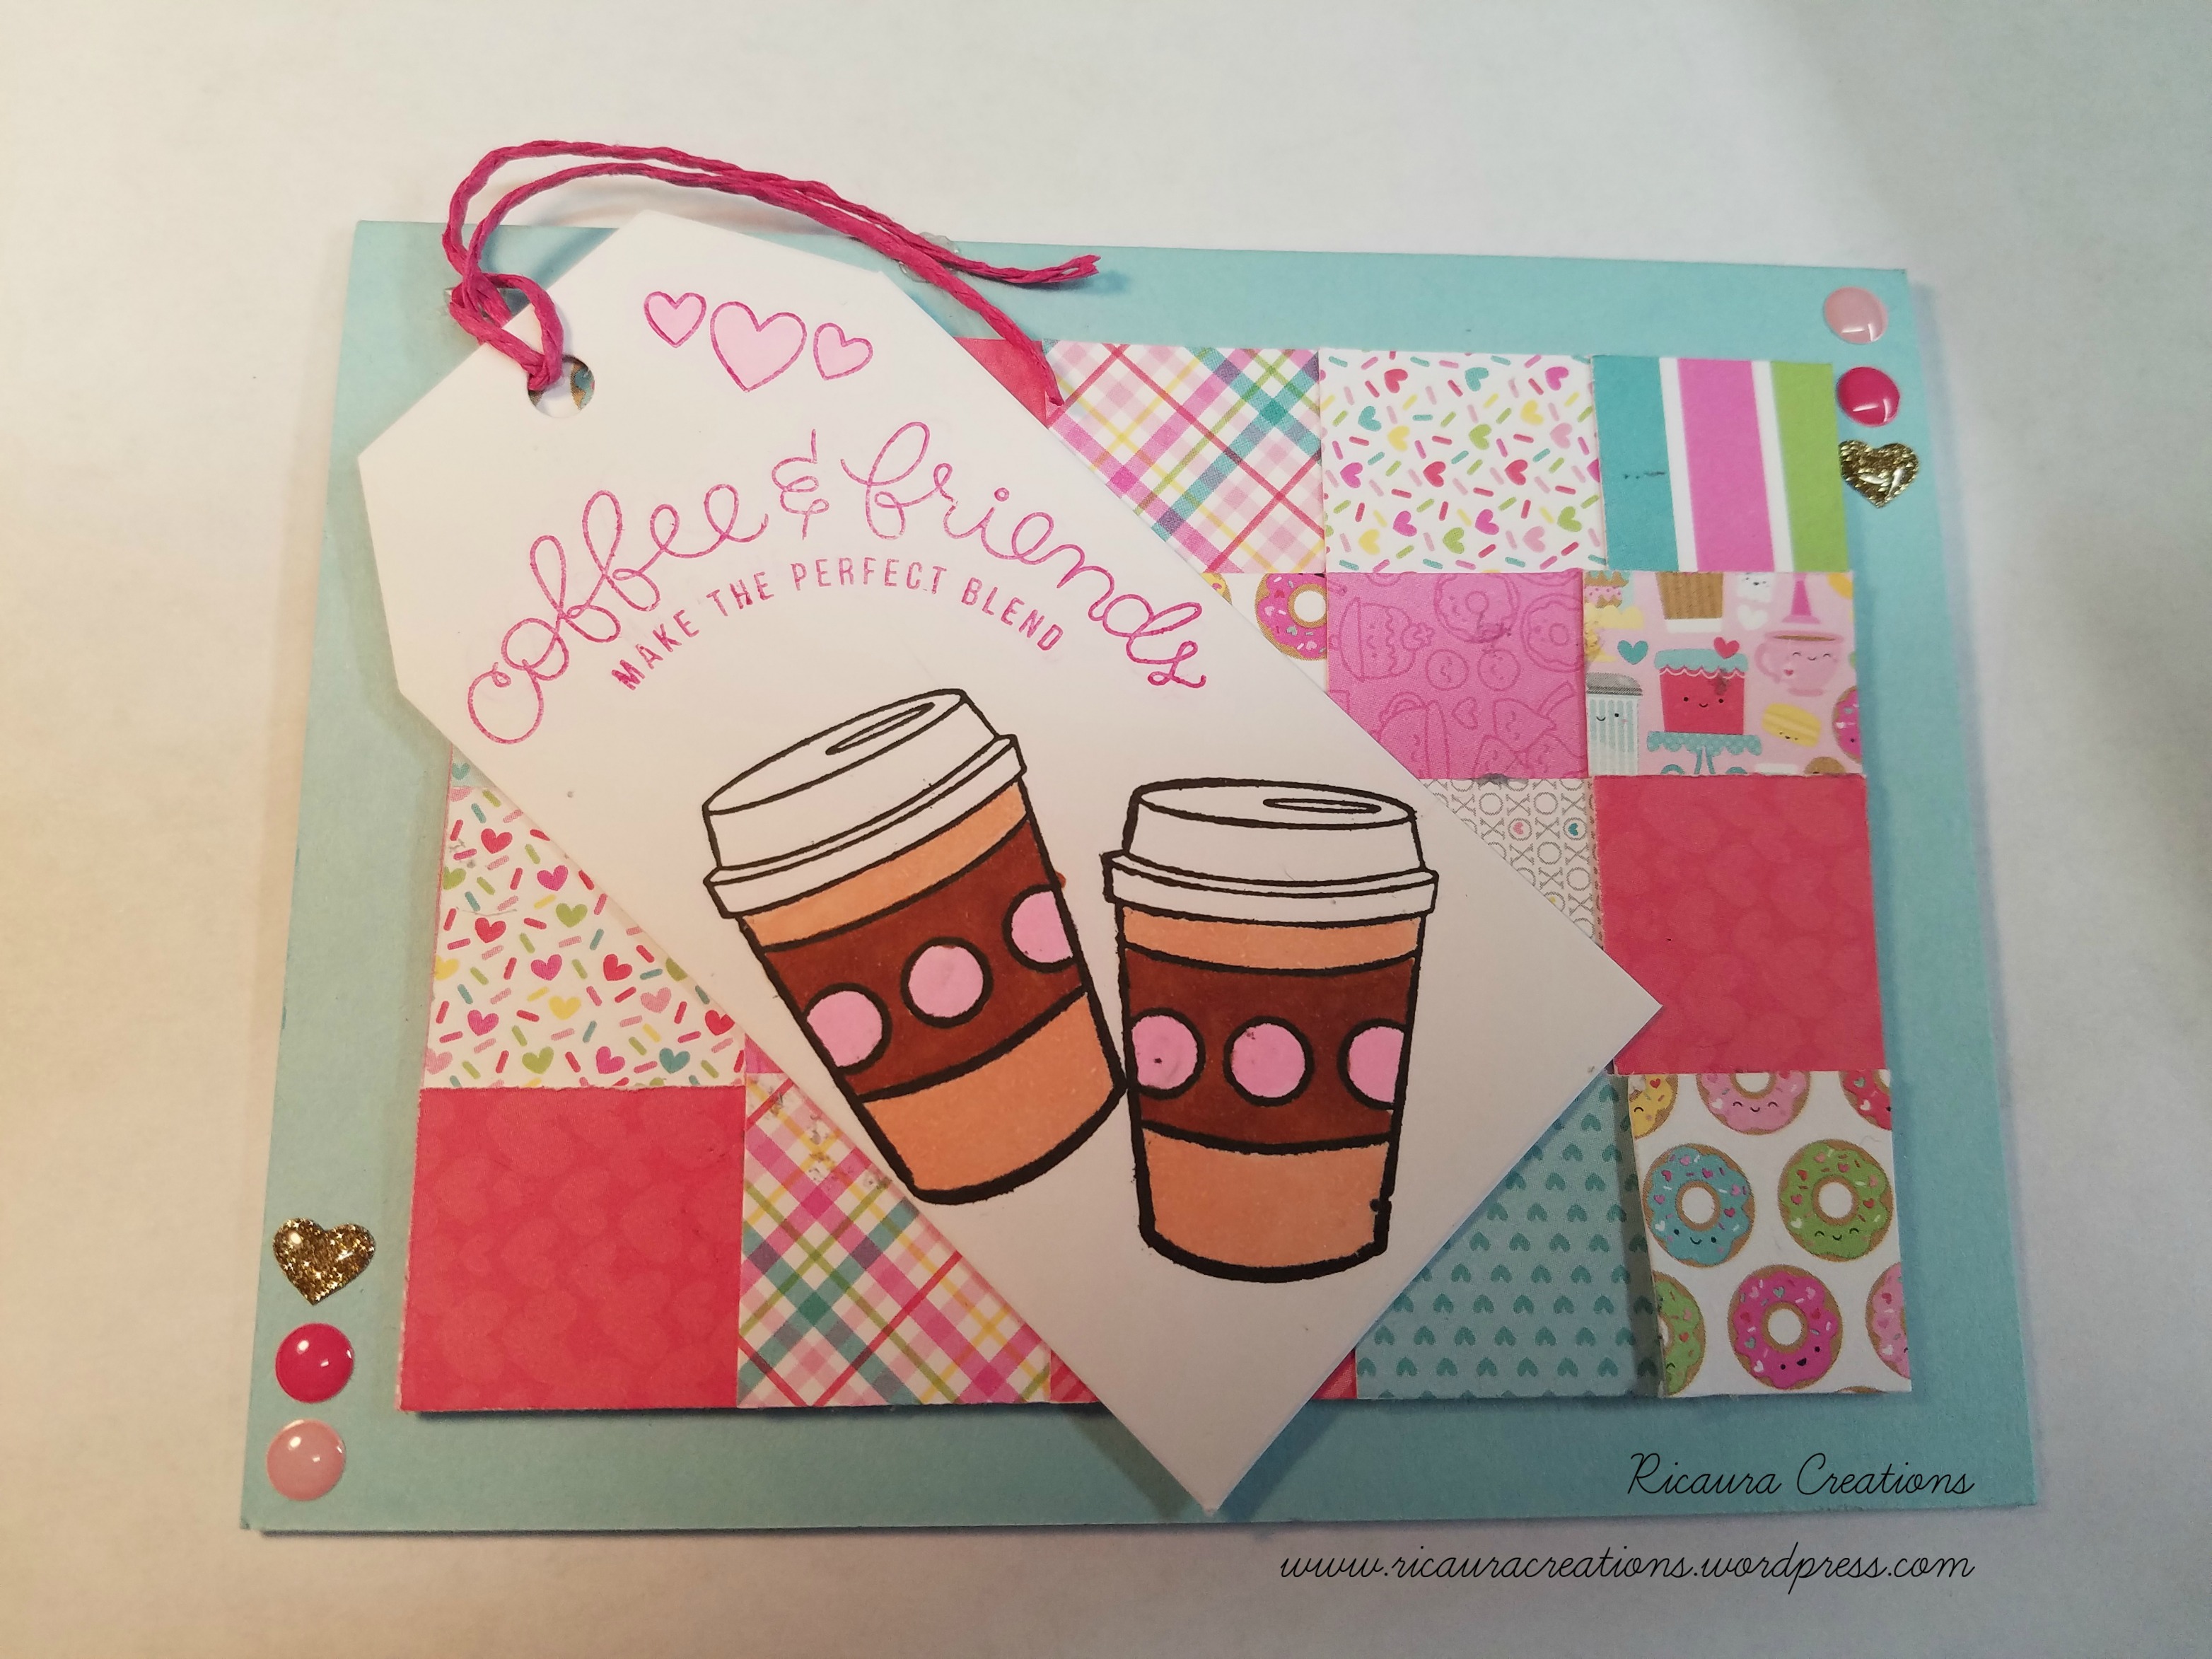
This last card started off as one thing, but ended up as another. I had a lot of scraps left that I wanted to use up, so I cut 1″ squares from as many of them as I could. I then created a patchwork quilt from them. They were glued onto a piece of white cardstock, popped up with foam tape, then glued to the Surf Blue card base. I created a longer tag so I could fit two stamped coffee cups, the sentiment and a few hearts. I topped this off with a piece of the fuchsia cord and glued it all down. I added two light pink, two dark pink, and two glitter hearts to the card base and I was done!
I have to say…again… that this card kit was fun. I love the paper pad from Doodlebug and I have to order more of those adorable puffy stickers, also from Doodlebug! I tried to order them after I got the kit, but they were already sold out! I guess I’m not the only one that loved them!
Well, that’s all for now, crafty friends. I hope you have a wonderful day and enjoy crafting. Until next post…